Here is a full guide on how to complete Tricky Doors walkthrough level 6 puzzle game, which is called Museum.
Tricky Doors is a puzzle game where the aim of the game is to escape the room by completing different mini-puzzles and finding objects in the rooms to help you. This game is available to download and play on the PC, Nintendo Switch, Android and iOS devices and is a free-to-play game.
There are new levels that are still being released and we will do our best to create the walkthroughs/guides to help you complete the sections you may be stuck on as quickly as possible. This article will show you how to complete the sixth level of the game, which is called Museum.
Tricky Doors Walkthrough Level 6 – Museum
Here is our Tricky Doors Walkthrough Level 6 Guide:
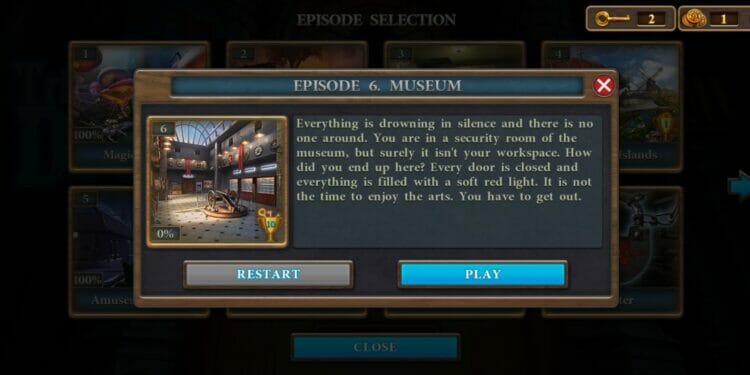
To get access to the sixth episode or level, you will need to complete the first five. We have done full detailed guides for all of these, which you can see by clicking here. Tricky Doors have names for the different levels and the sixth one is called Museum. Once you have clicked to play this level, you will see the following information:
“Everything is drowning in the silence and there is no one around. You are in a security room of the museum, but surely it isn’t your workspace. How did you end up here? Every door is closed and everything is filled with a soft red light. It is not the time to enjoy the arts. You have to get out.”
Once you click on ‘play’ you will be transported to the first room of the museum which looks to be an office. There are a few objects that you can collect from this scene, which are:
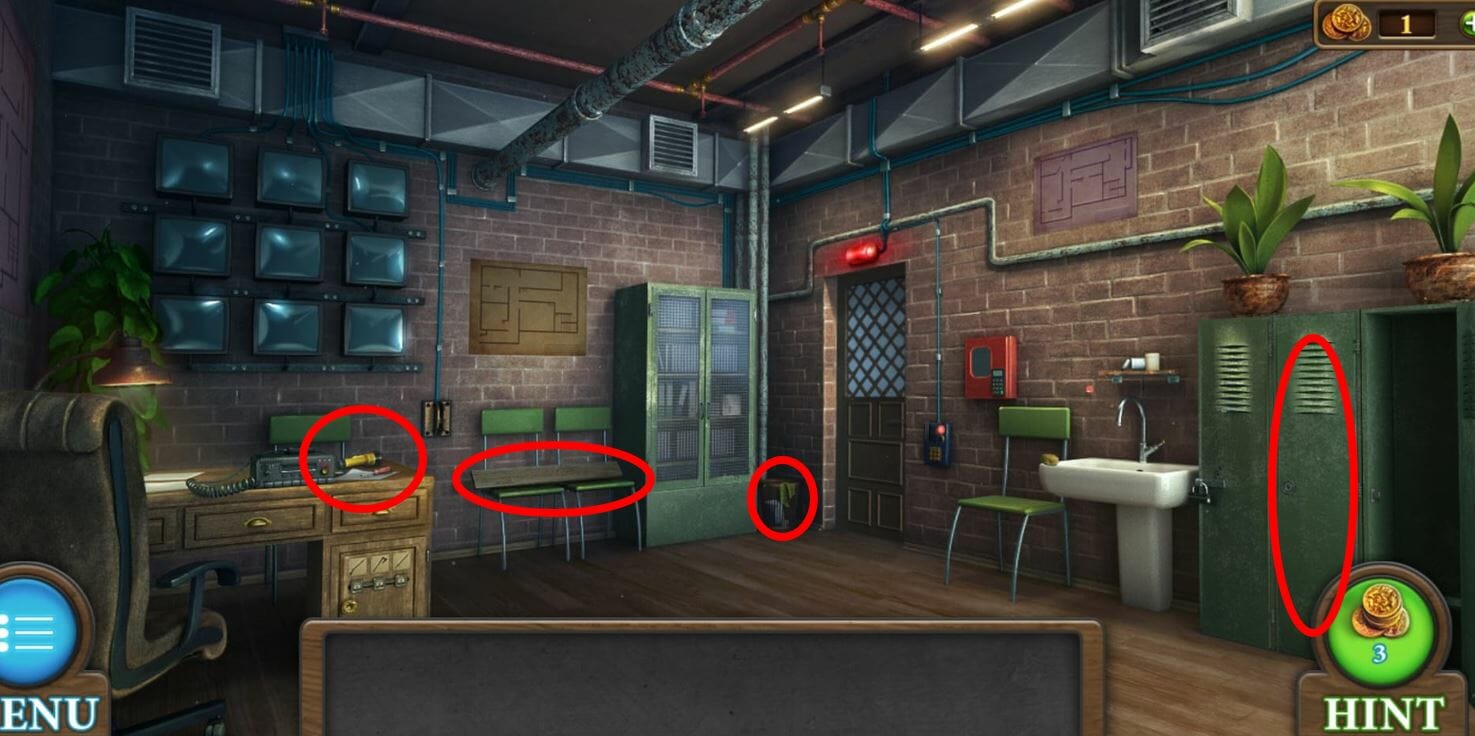
- Plank – click on the middle green locker on the right side of the room, which will open to show the object.
- Plank – another plank can be found on the green chairs at the back of the room.
- Screwdriver, clip and flashlight – all three items can be found on top of the desk on the left.
- Cloth – if you click on the cabinet at the back of the room near the door, it will show you a bigger picture. The bin in the right bottom corner has the cloth on it.
If you are struggling to find all these items, we have highlighted the locations in the image below:
Once you have retrieved these items, you will then need to click on the first locker on the right of the room and click on the lock.
In order to play the mini-game, you need to put the screwdriver in the lock and then click on the clip to add it to the top of the screwdriver.
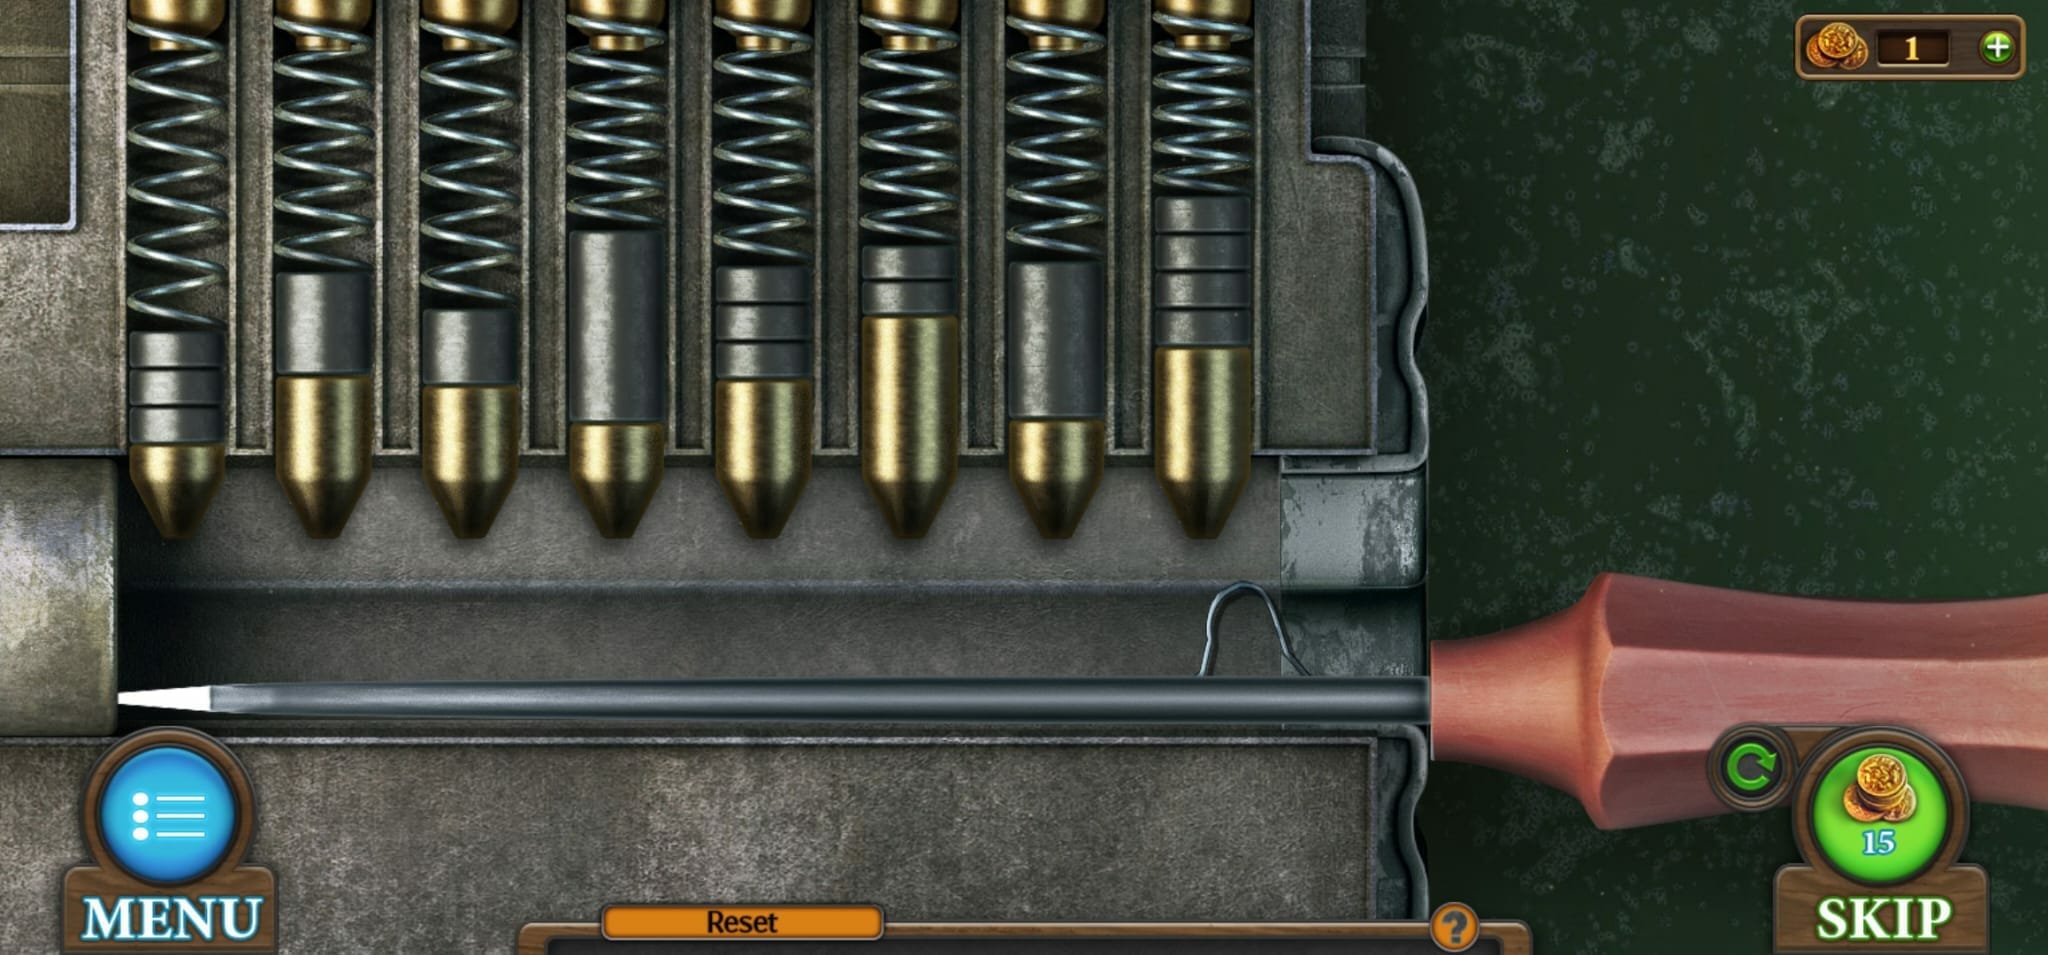
You will now need to lift the pins to open the lock. It looks like the solution is different for everyone, but it is essentially a memory game where you need to see which order they need to be put up in.
Once you have completed it, the locker will open. You can get the handle from the jacket pocket and key card hanging on the side. There is also a hammer at the bottom of the locker, which can he added to your inventory.
Now, you can use the handle on the mechanism on the middle of the wall at the back of the room. Click on handle once it has been attached to turn the monitors on. This is the code you need for the lock next to the door.
It looks like the solution for this is the same for everyone, so here are the buttons you need to press:
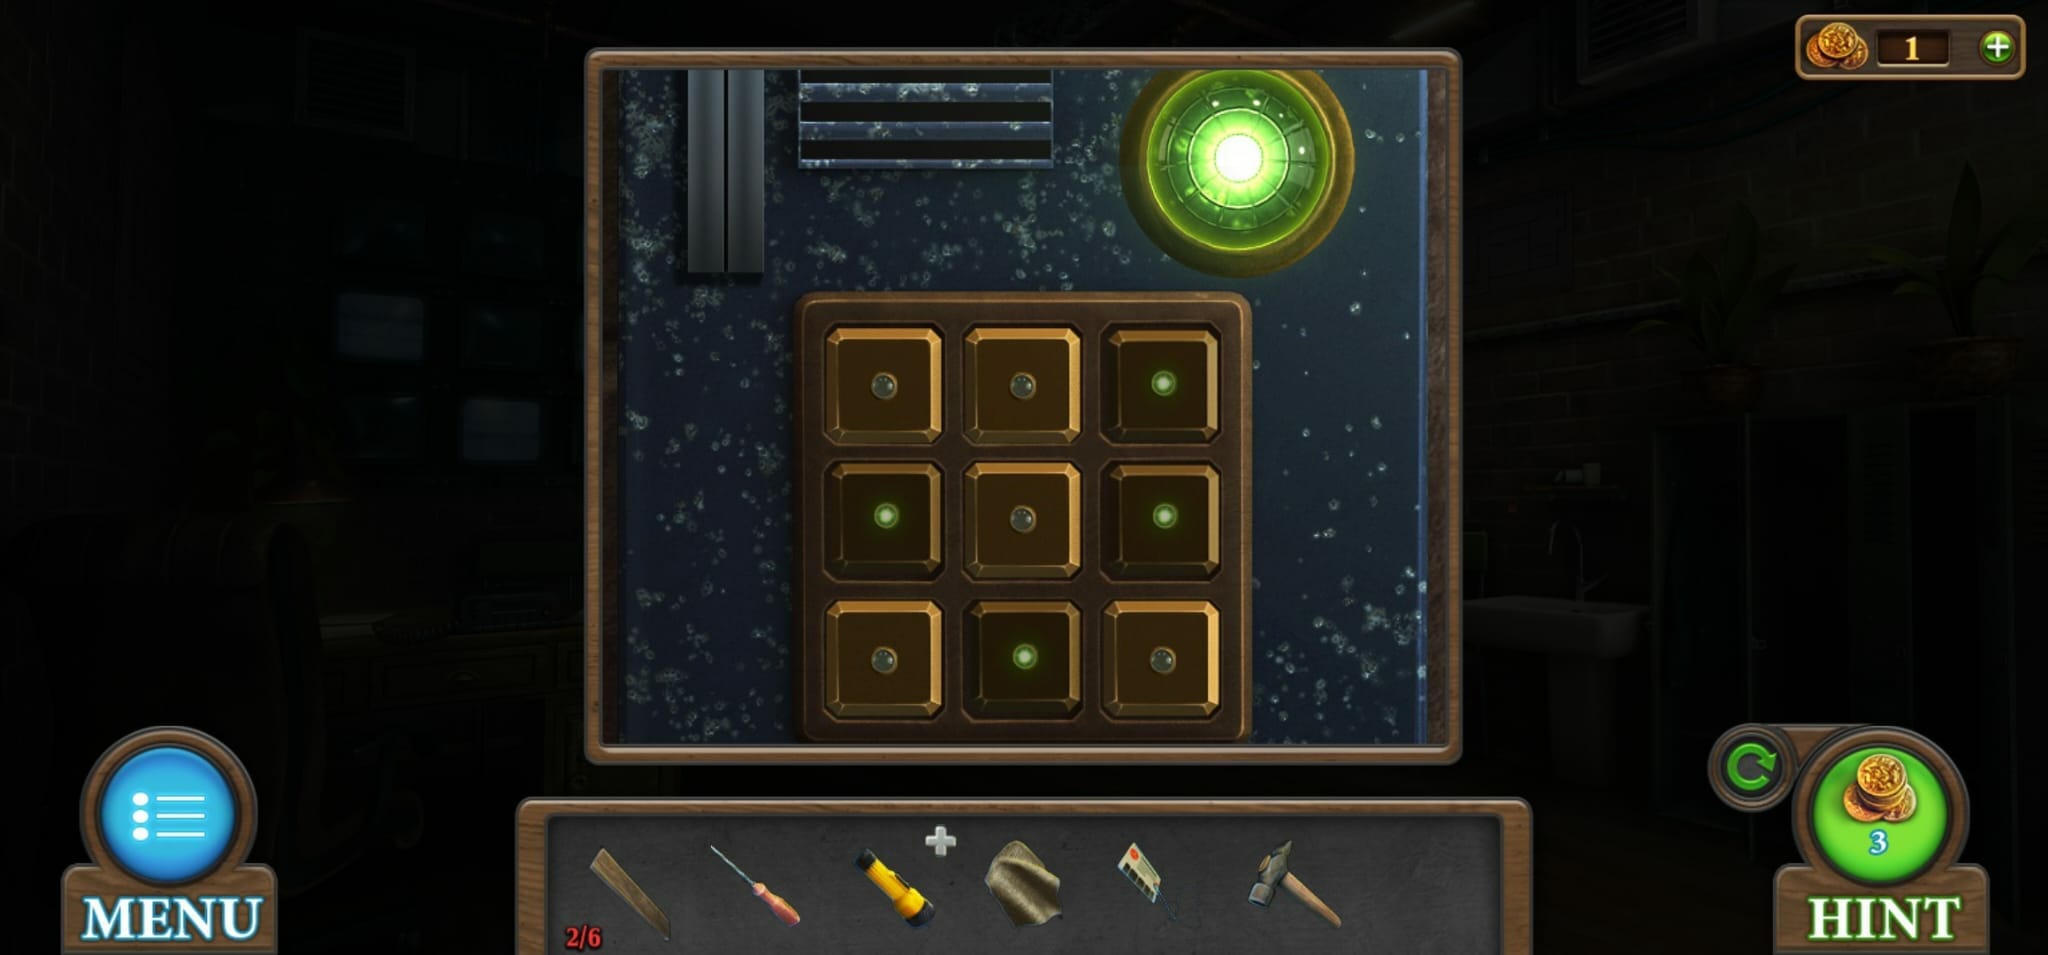
You can then use the access card from your inventory on this and then click on the door to open it to get to the next scene, which shows you some exhibits in the museum. There are a few items that you can collect from here, which are:
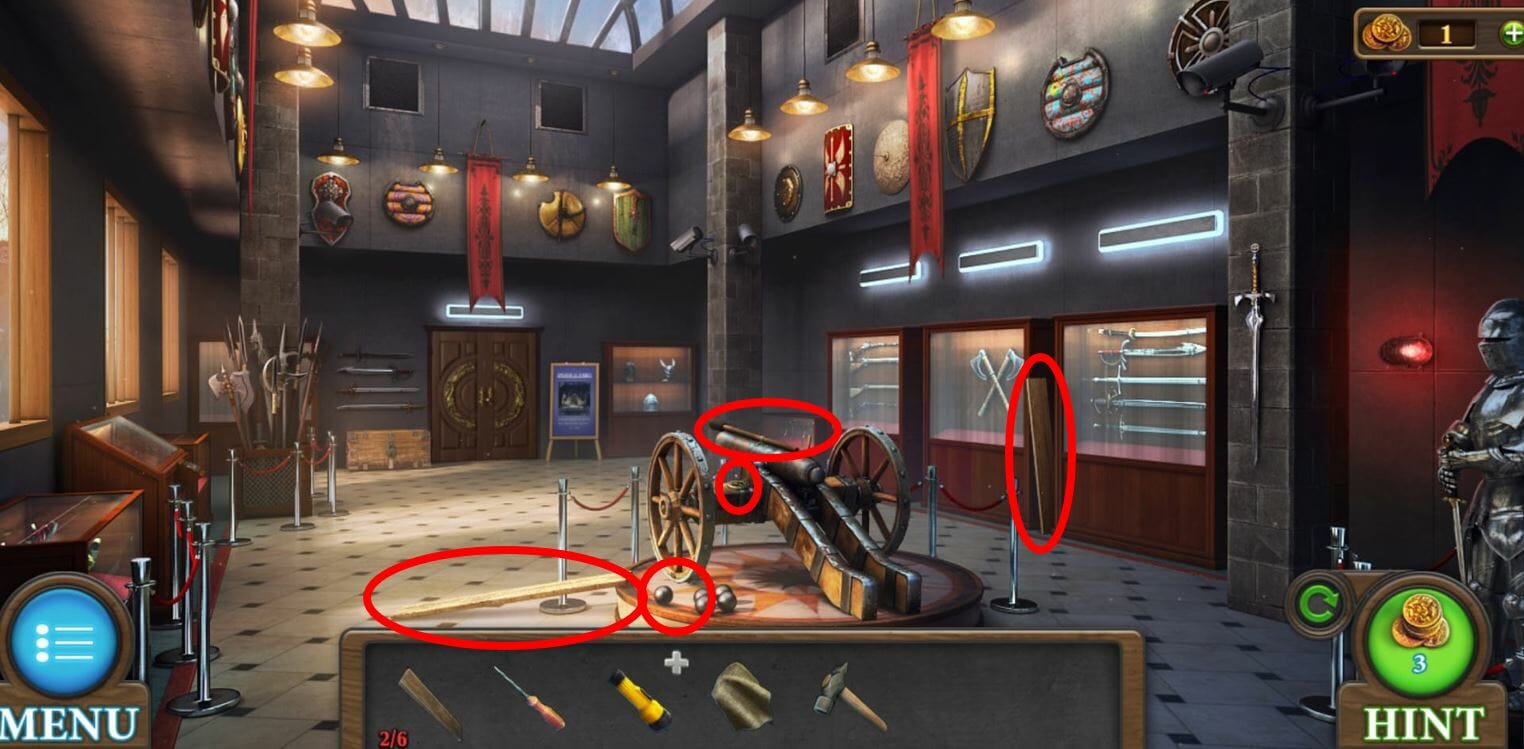
- Plank – one can be found standing up in between the cabinets with the axes in one and swords in the other.
- Plank – another one can be found next to the exhibit in the middle of the room, on floor on the left.
- Canon ball – this is next to the plank of wood you just found.
- Ramrod – click on the canon, which is the exhibit in the middle of the room. Click on the top twice, where you can then use the screwdriver to loosen the top part. This will allow you to put the ramrod in your inventory.
- Carved decor – this can be found on top of the canon, to the left of the middle section where you found the ramrod. There is one more you still need to find before it can be used.
The objects have been highlighted in the image below:
If you look at the sign at the back of the room, it says “Media partner of the exhibition: radio station 104.2FM” The radio station we have highlighted in bold as this can be a different number for you.

You will need to go back to the office, where you can now tune in the station you have on your board. The radio is located on the desk and you need to click on the AM or FM on the left side and then use the dial to get the number.
Once you have done this, it will reveal a secret compartment, which has a carved decor in it, the last one needed. You will then need to go back to the exhibition room and you can use the carved decors on the exhibit on the left side of the room.
This unlocks a mini-game, where the aim of the game is to rearrange the action figures so that each one has a bomb in their hands.
It looks like this puzzle does not have the figures in the same starting position for everyone, but the solution of how the figures should be arranged can be seen in the image below. Keep in mind, you can move figures from any row and look at the hand positions of each figure.
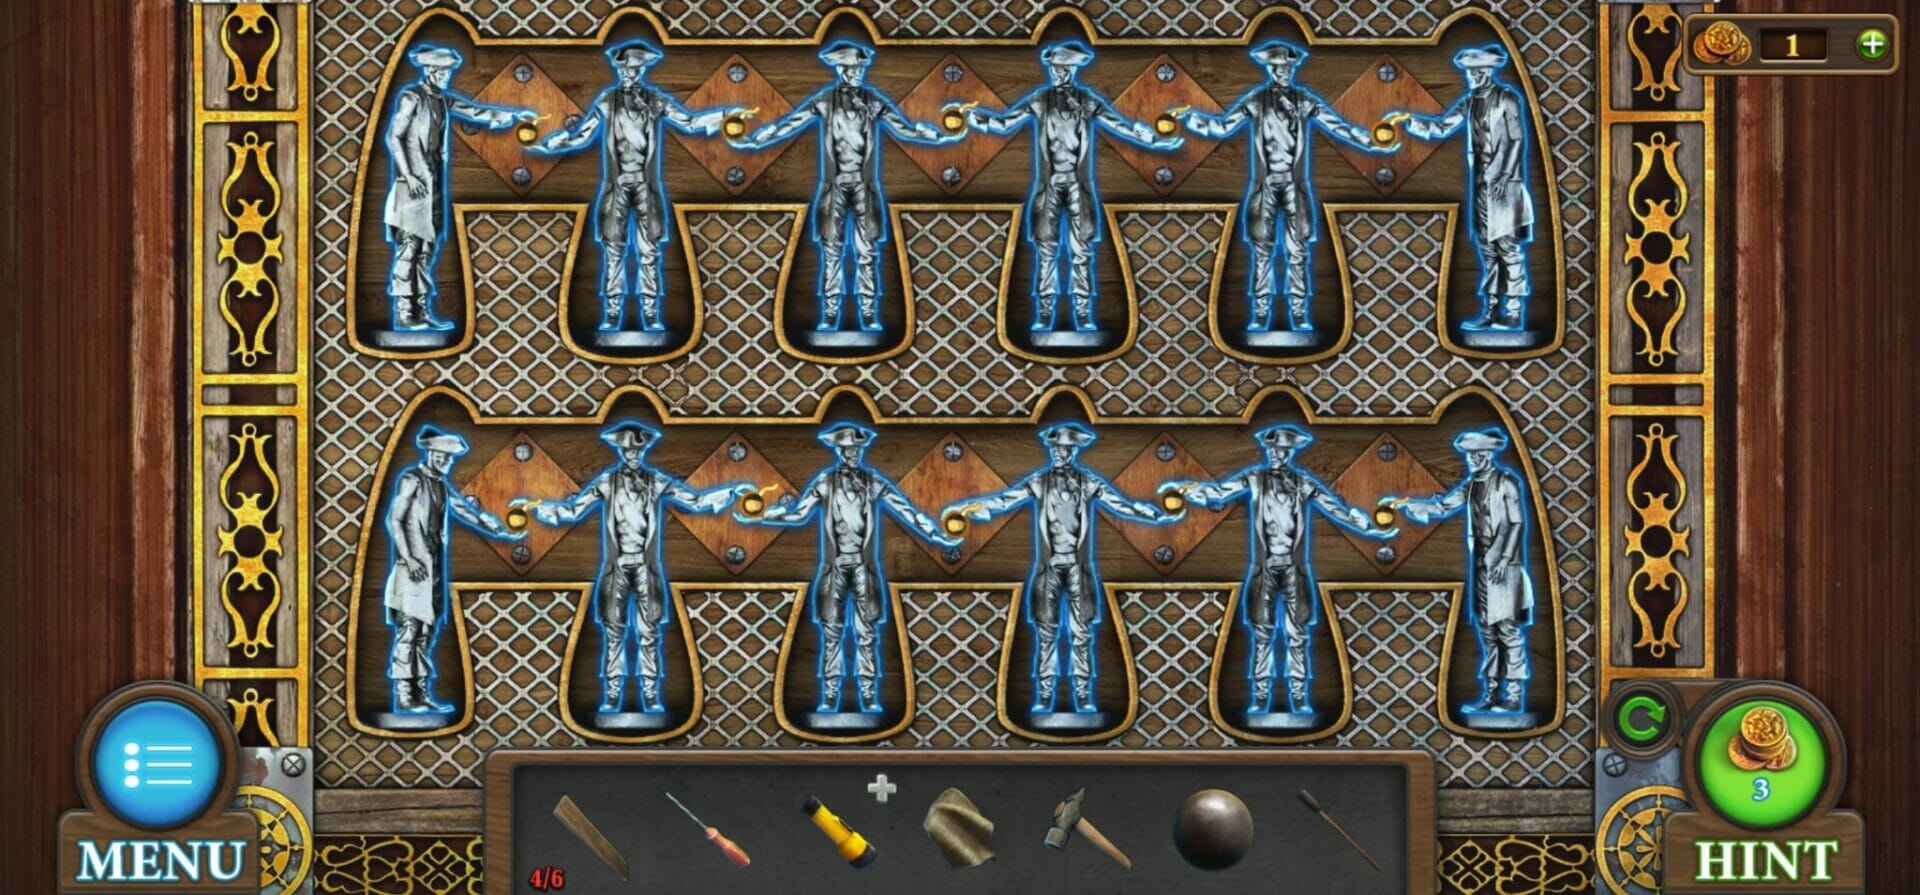
Once you have completed the puzzle, you will unlock the exhibit, where you can add the oiler to your inventory. If you look to the right to the room where you can see three exhibits with rifles, axes and swords, you need to count these and use it for a code in the office.
Click on the desk in the office and click on the bottom cabinet where you can input the code for the number of items seen in the exhibition room.
The code should be the same for everyone, which is 4, 2 and 5 – IV, II, V for the code.
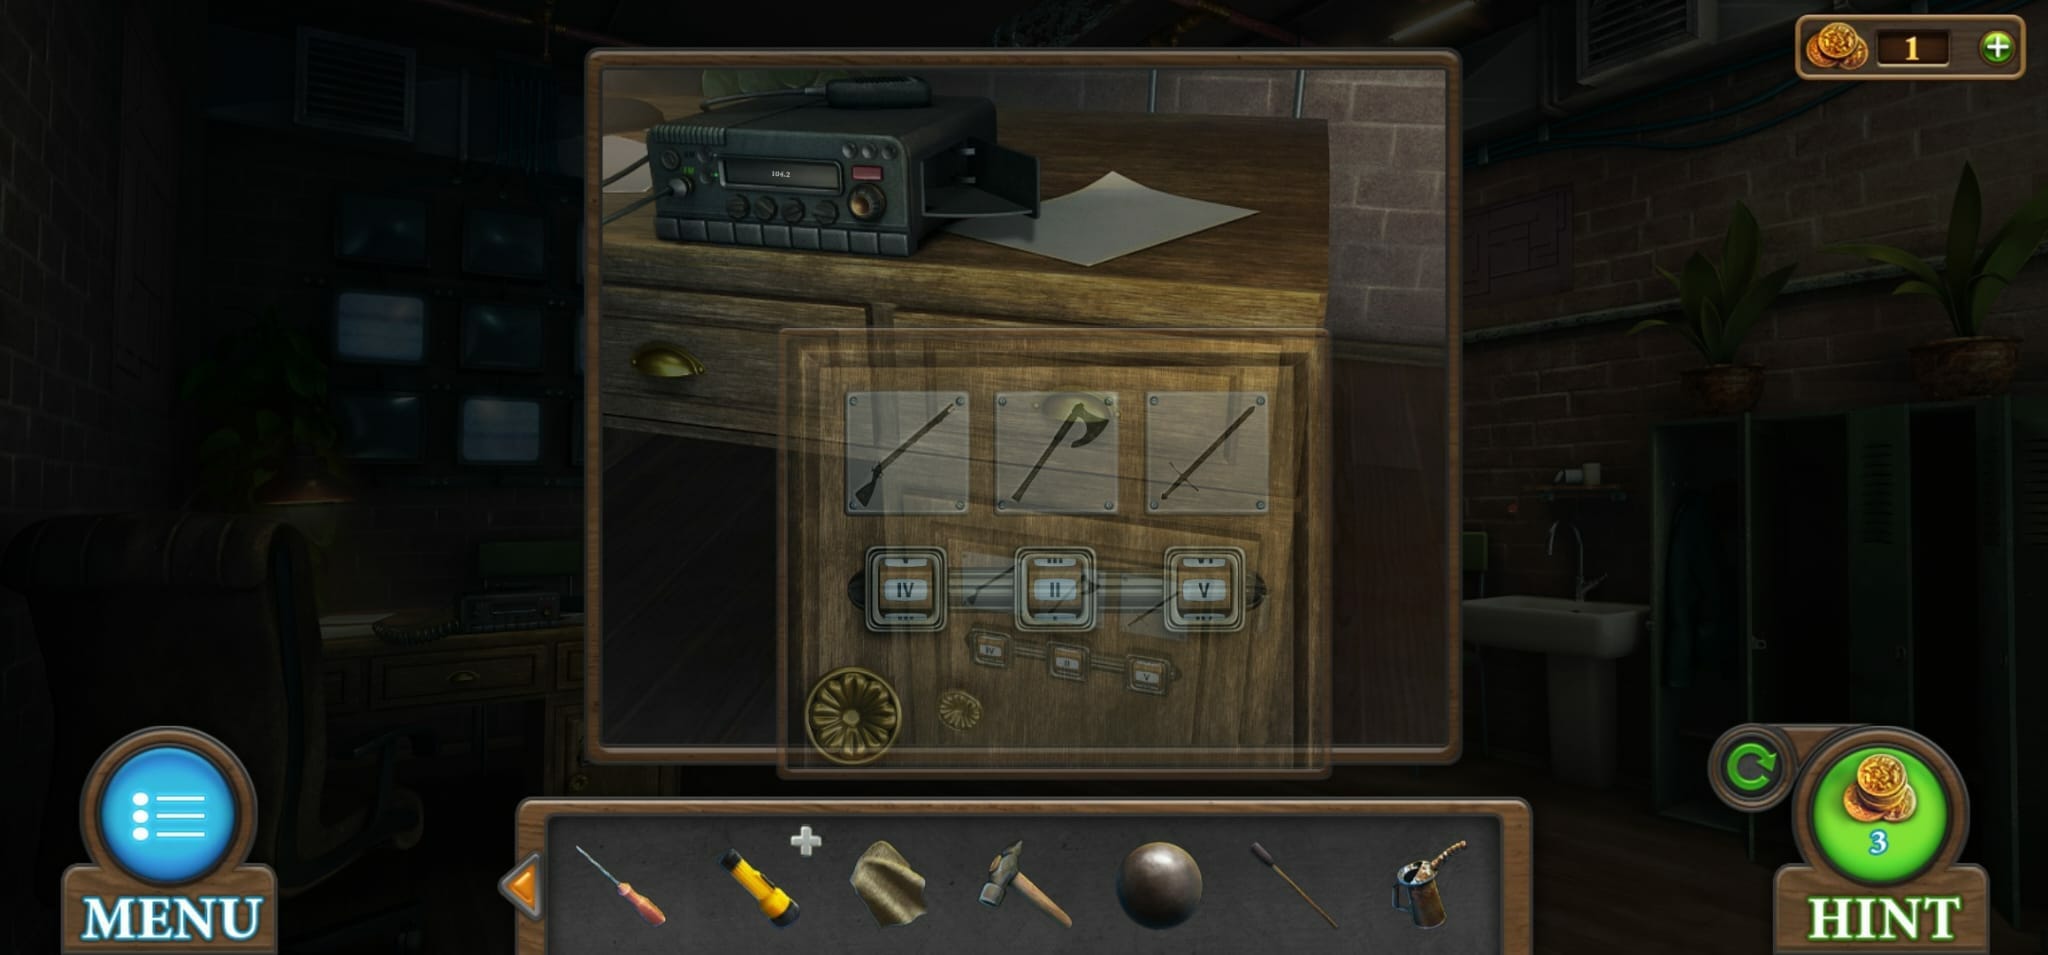
This will open the door and you can get the gunpowder and knob from here (there are four to collect all together).
Now you need to go back to the exhibition room and use the gunpowder in the canon. You then use the ramrod to push it in, followed up by the canon ball from your inventory.
Use the ramrod again to push the ball back and get some gun powder on it. Then you need to add the cloth from your inventory to the top of ramrod and then the oiler next. This will make a torch.
There is a red light which is on the right side of the room on the wall right near the suit of armour. Use the hammer in your inventory to break the light and you can then use the torch on it to make a burning torch.
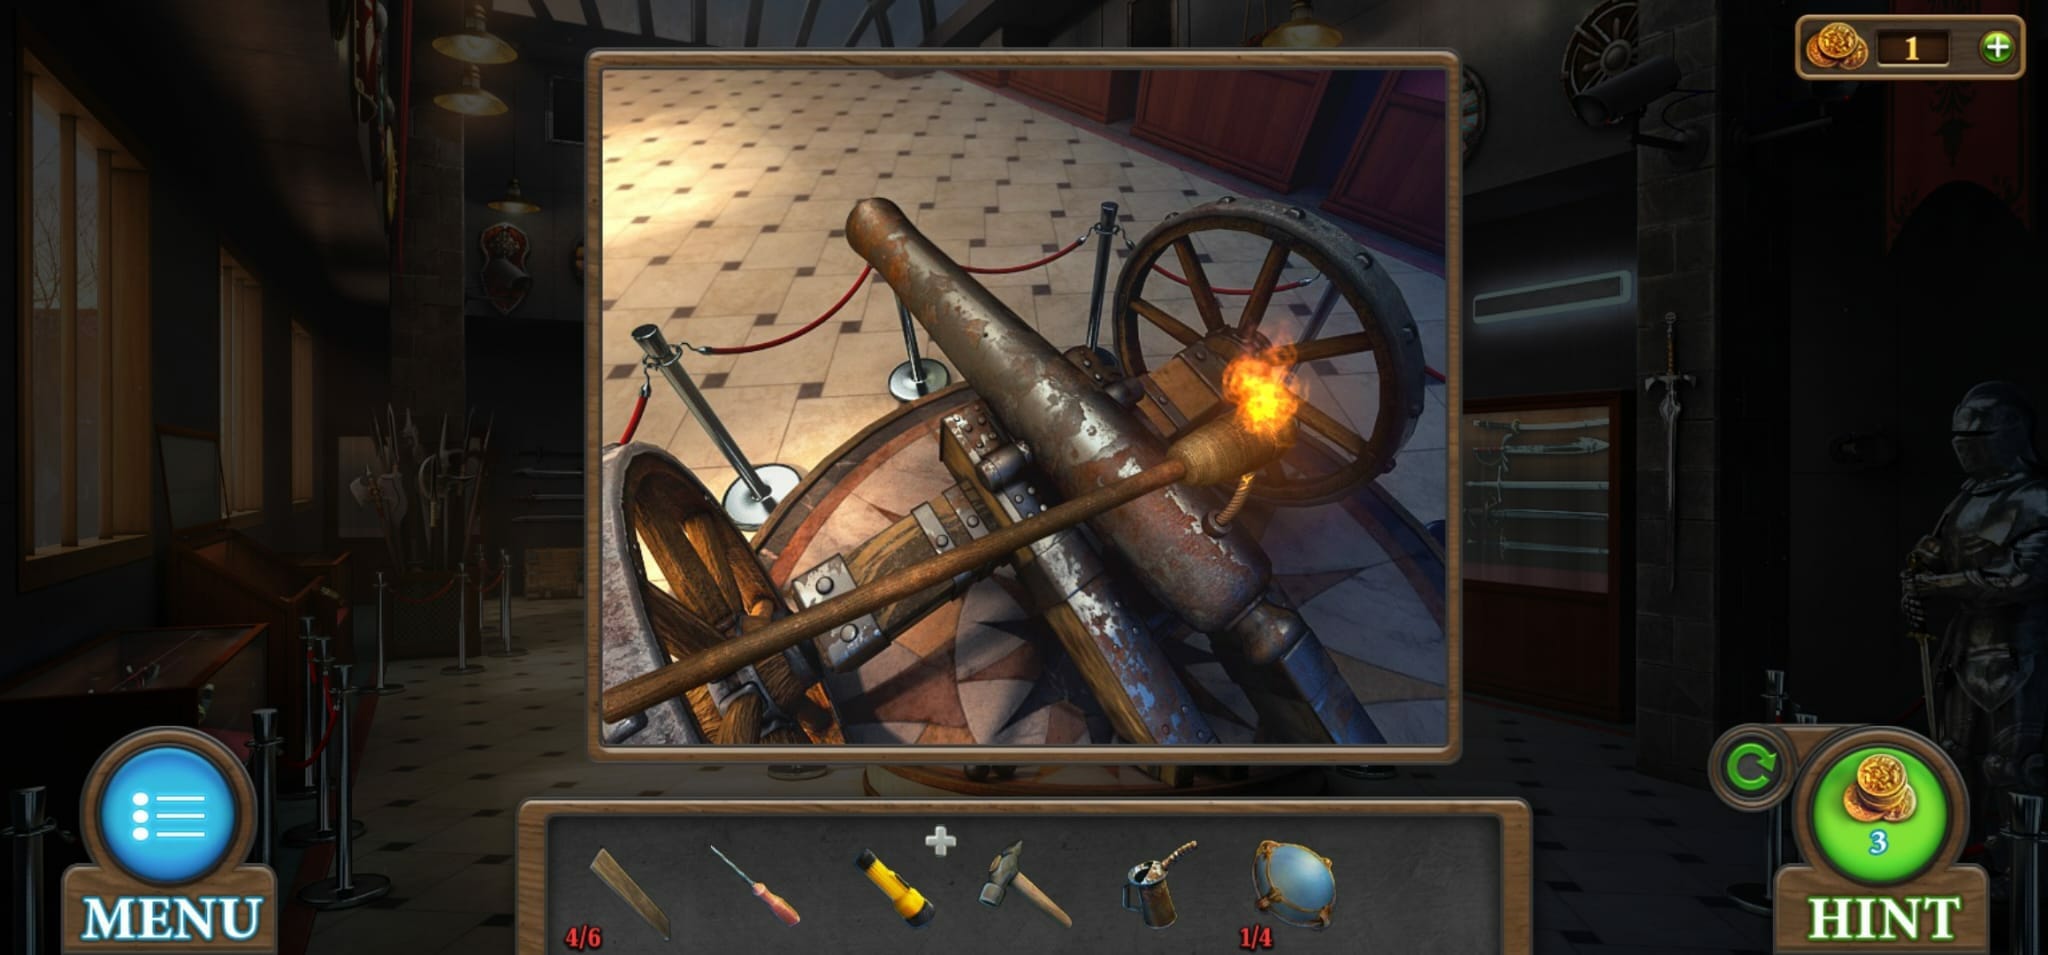
This torch can now be used on the fuse on top of the canon, which will break a hole in the door in front of you, allowing you to go into the last room.
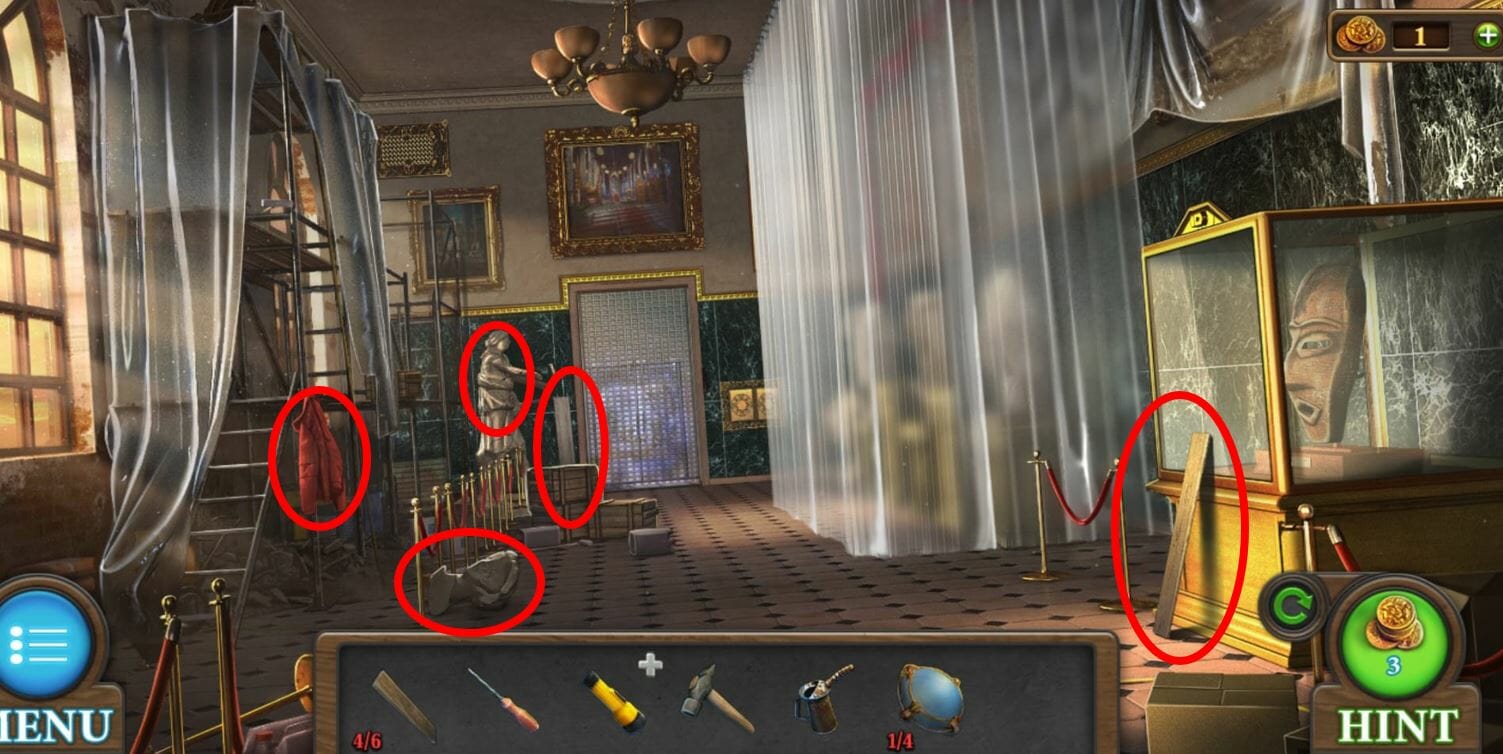
You can collect a few items form this room as well, which are:
- Plank – leaning on the exhibit on the right.
- Plank – the last one can be found on the left of the door right at the back of the room.
- Heads – found on the floor next to the rope on the left. (three to collect in total)
- Key – you can click on the red jacket on the left side of the room. It says the zip is stuck but you can just the oiler to open it, where you will get a key.
- Key – there is a sculpture in the back and you can use the hammer in your inventory to smash the arm, which reveals a key.
Here is where they are located:
If you go back to the first scene, which is the office, you will be able to use the key on the cabinets in the back. Here you can add the batteries from the bottom shelf to your inventory.
There are some cassettes on the top shelf, which you need to rearrange in the following order from top to bottom:
- Hundred Years’ War
- American Revolutionary War
- Napoleonic Wars
- American Civil War
- World War 1
- World War 2

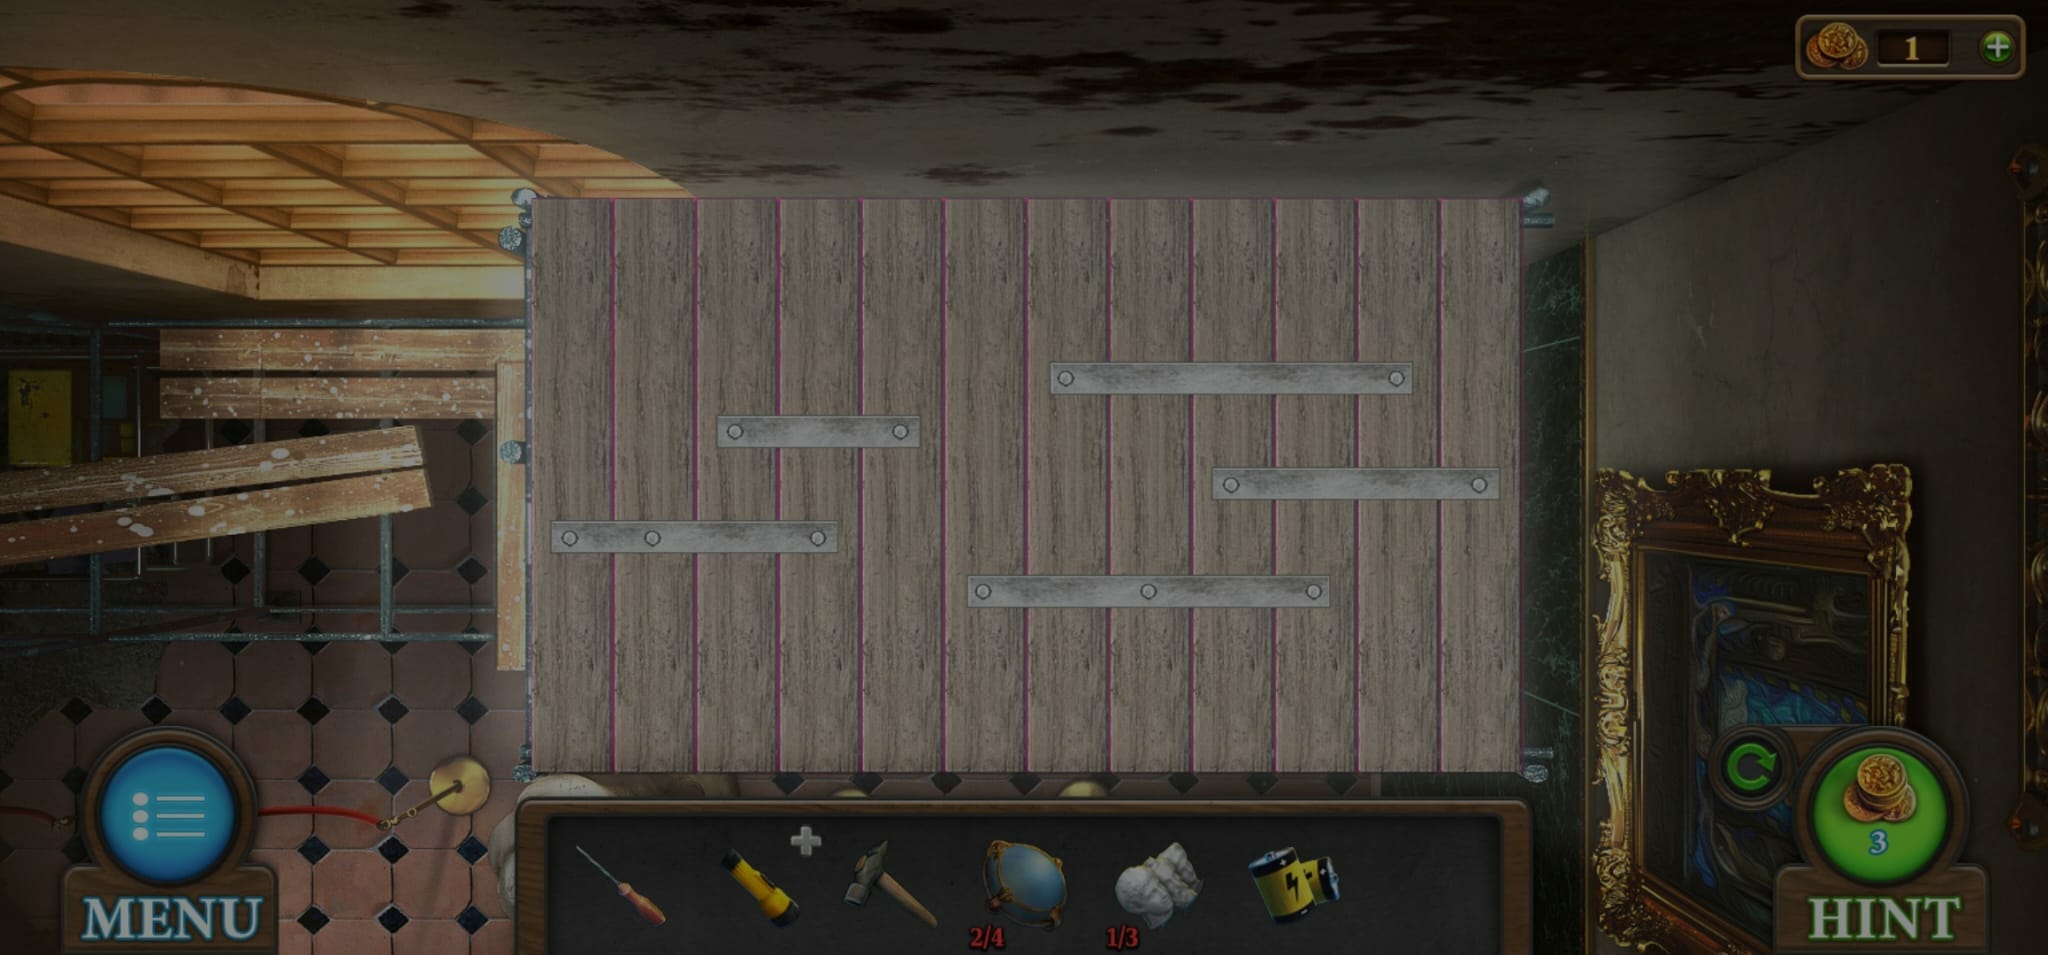
This will unlock the compartment on the right, allowing you to add the second knob to your inventory. Now you need to go to the third scene and click on the scaffolding on the left and add the planks to it.
A mini-game will appear where you need to arrange the planks to fix the scaffolding. The planks are in different places but it is fairly straightforward to solve and there are three different levels you need to fix.
Now you can click on the ventilation at the top and use the screwdriver in your inventory to remove the front panel. Click on the flashlight in your inventory so you can see the object fully. You then need to click on the black screw at the bottom to take it off and add the batteries to the flashlight. You can now use the flashlight on the vent, which will show you a head inside and this leaves only one more head for you to find.
The next thing you need to do is to go back to the second room, where you can use a key on the chest located next to the door. From here, you can get the third knob as well as the last head.
If you go back to the last room, you can click on the curtains on the right and put the three heads here to start another mini-game. The aim of the game is to put the statues together by rearranging their parts.
Here is what the statues look like once they have been arranged correctly:
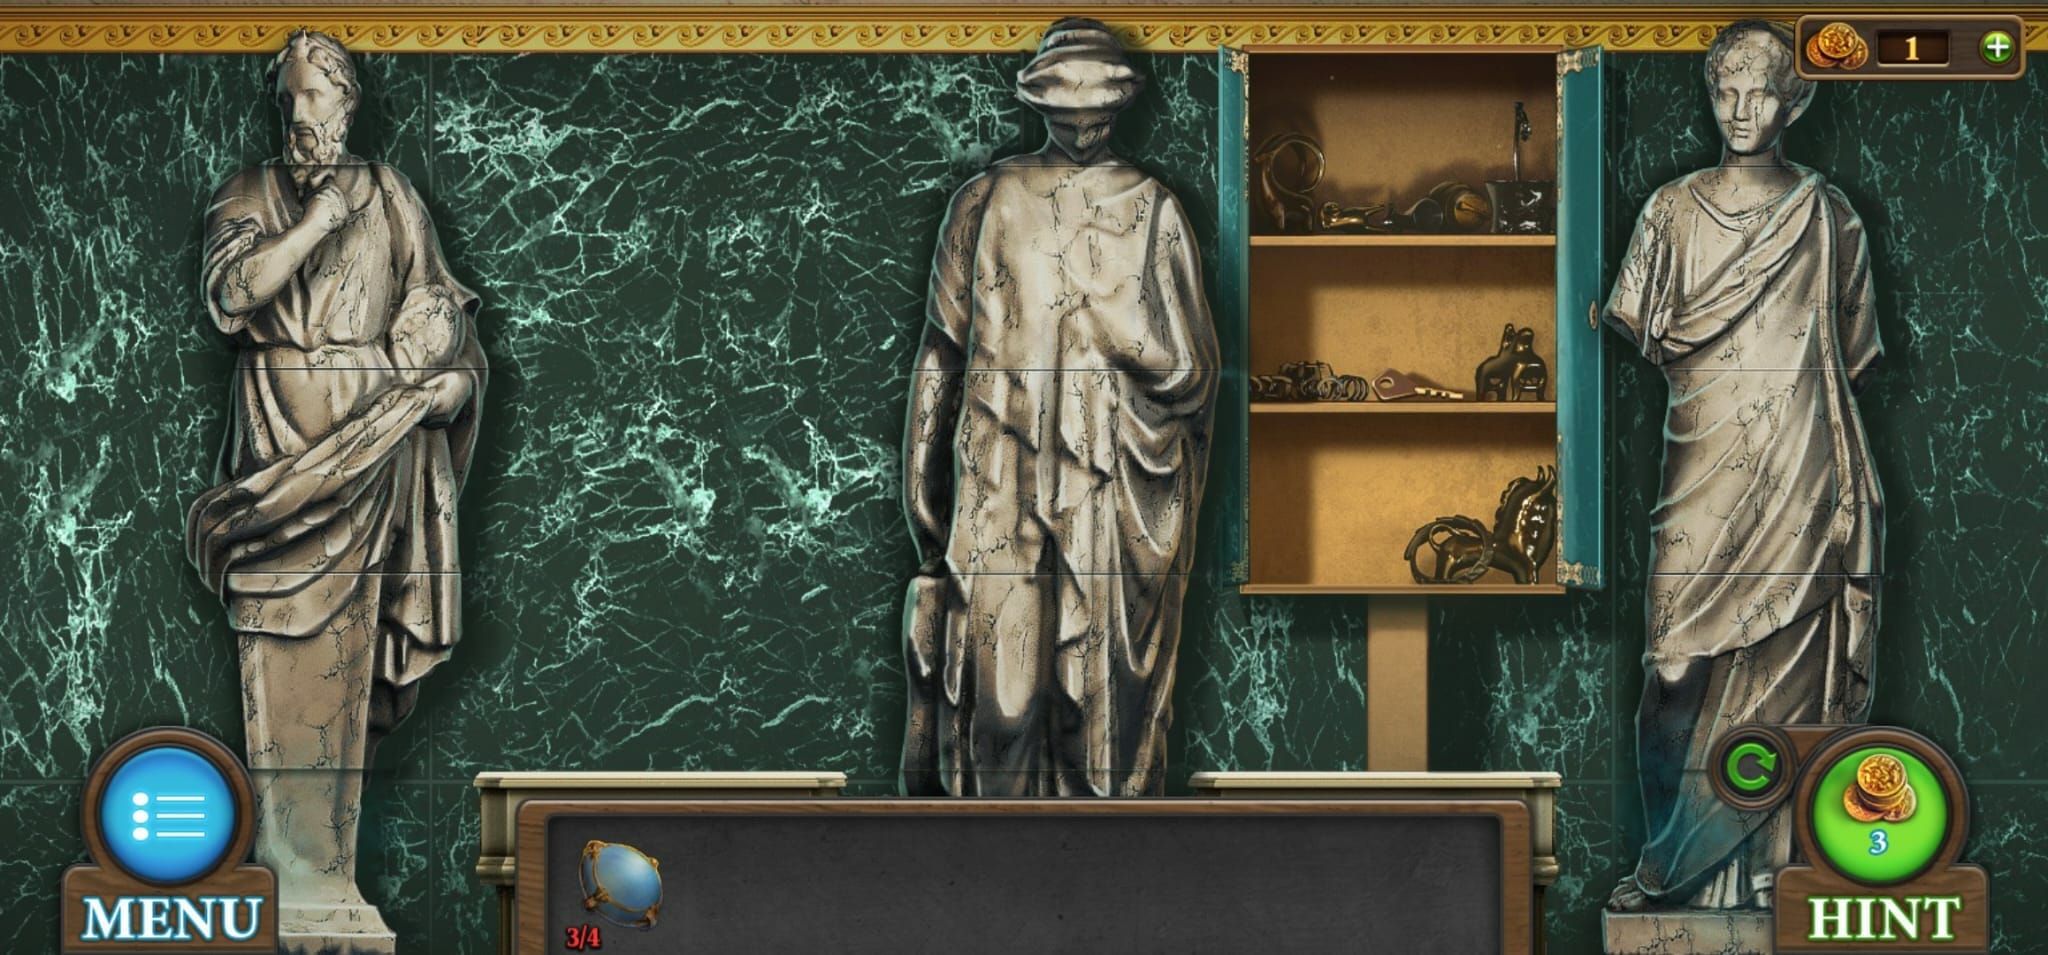
Once completed, the cabinet will open and you will be able to retrieve a gold key. This gold key can be used to open the exhibit on the right and you can add the mask and tap flywheel to your inventory.
You now need to go back to the office and click on the sink. Click on the sponge first and put it on top of the drain. Add the tap flywheel to the tap and then click to turn the water on and wet the sponge. You can add the wet sponge to your inventory by clicking on it.
The wet sponge can now me used on the mask in your inventory to wipe away the dirt and it will reveal the numbers 2674. This is the code you can use on the red box that is near the door of the office. Once you have opened the box, you can add the last knob to your inventory.
Now you need to go to the last room and click on the mechanism on the right of the door. You can add the knobs to this, which will unlock a mini-game and the aim of the game is to place the knobs where the background matches the picture.
Here is what the puzzle looks like once completed so you know which symbols match each background:
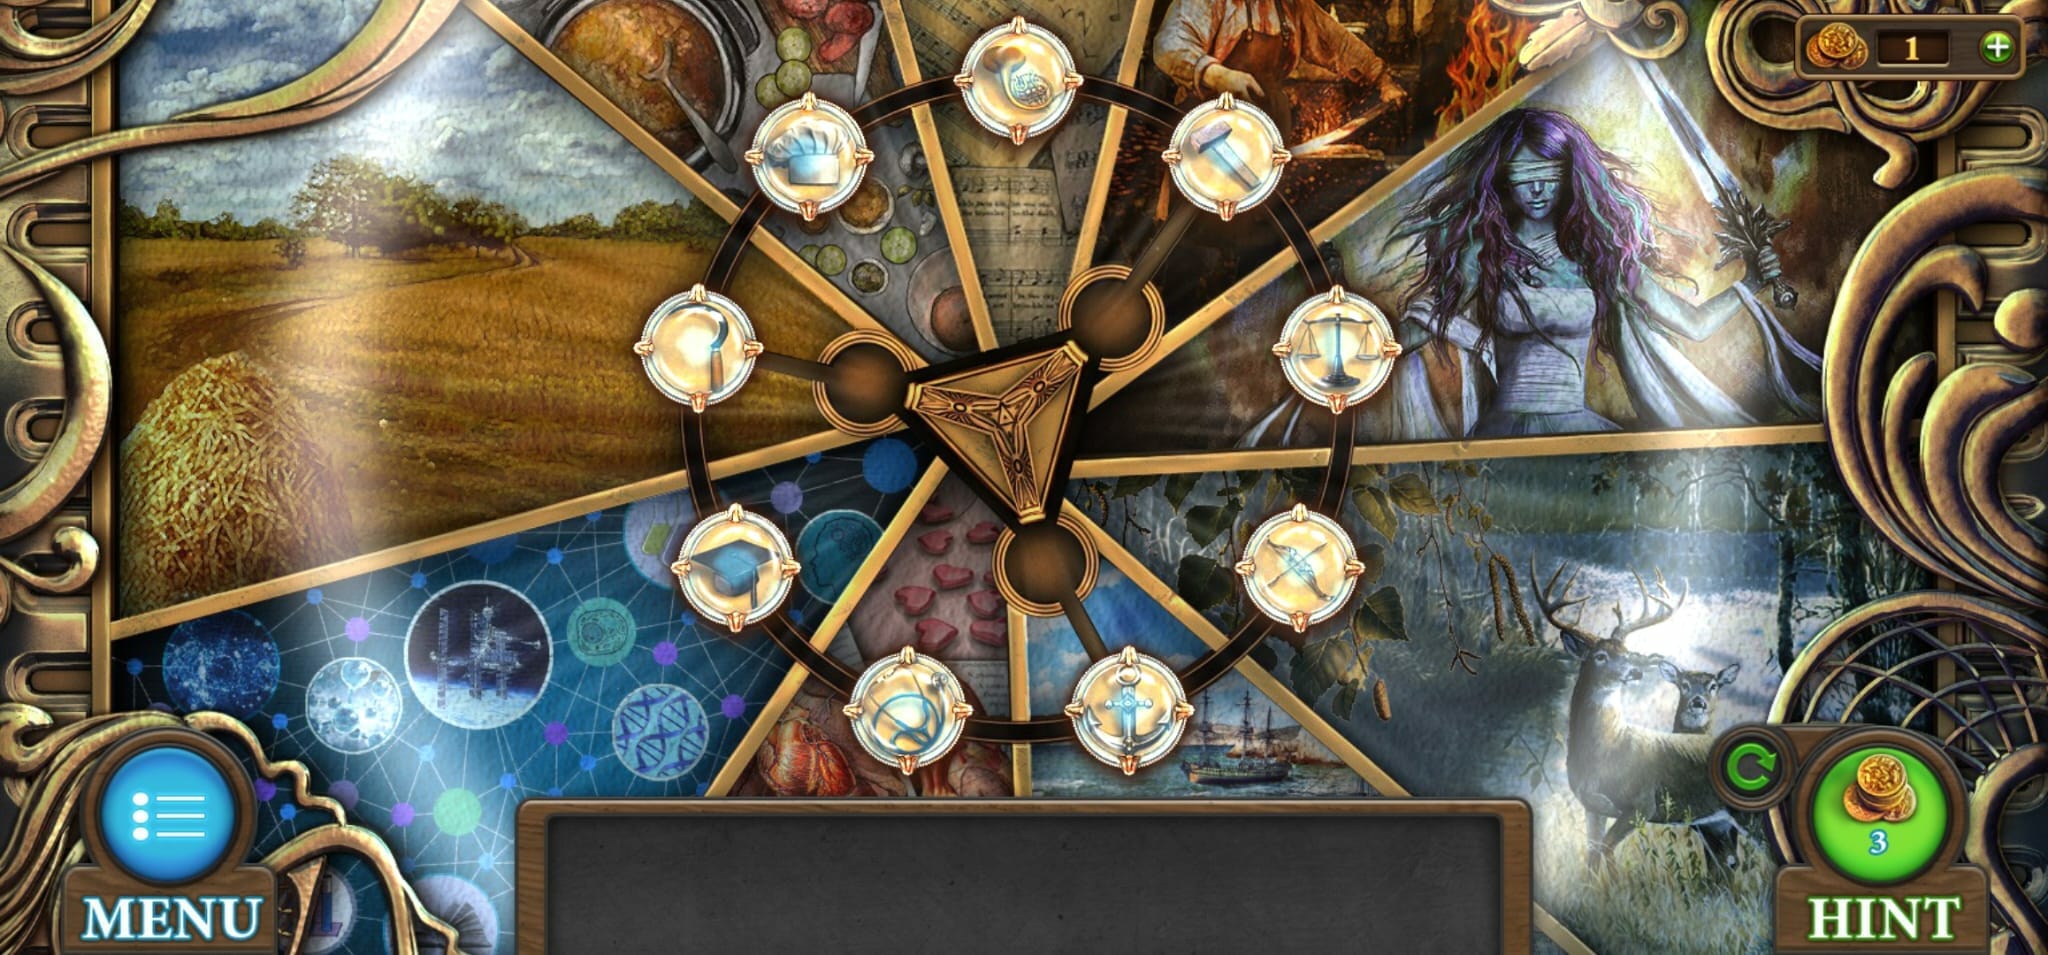
This is the last puzzle you need to solve to open the final door, completing the level!

For a complete guide on the next level, click here.

