Here is a full guide on how to complete Tricky Doors walkthrough level 3 puzzle game, which is called Locked Apartment.
Tricky Doors is a puzzle game where the aim of the game is to escape the room by completing different mini-games as well as finding objects to help you. Some of these puzzle are more difficult to solve than others, which has led some players to look for the walkthrough of these games. This game is available to download and play on the Nintendo Switch, PC and Android and iOS devices and is free to play.
There are new levels that are still being released in the game and we will do our best to create the walkthroughs/guides to aid you in completing the sections you may need some help on as quickly as possible. This article will show you how to complete the third level of the game, which is called Locked Apartment.
Tricky Doors Walkthrough Level 3 – Locked Apartment
Here is our Tricky Doors Level 3 Walkthrough Guide:
To get access to the third episode or level, you will need to complete the first and second ones first. We do have a full guide on how to complete these, which you can see by clicking on the links below:
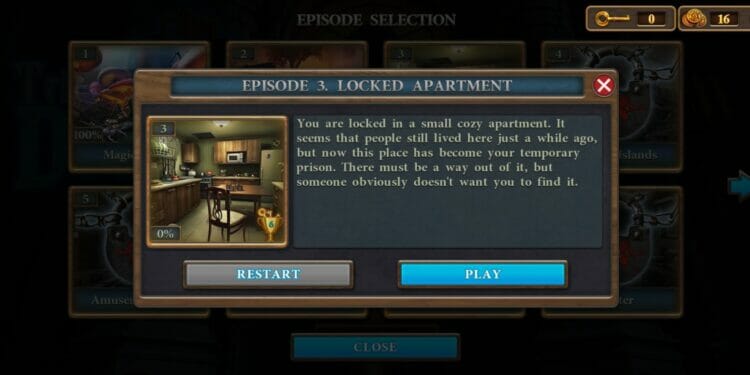
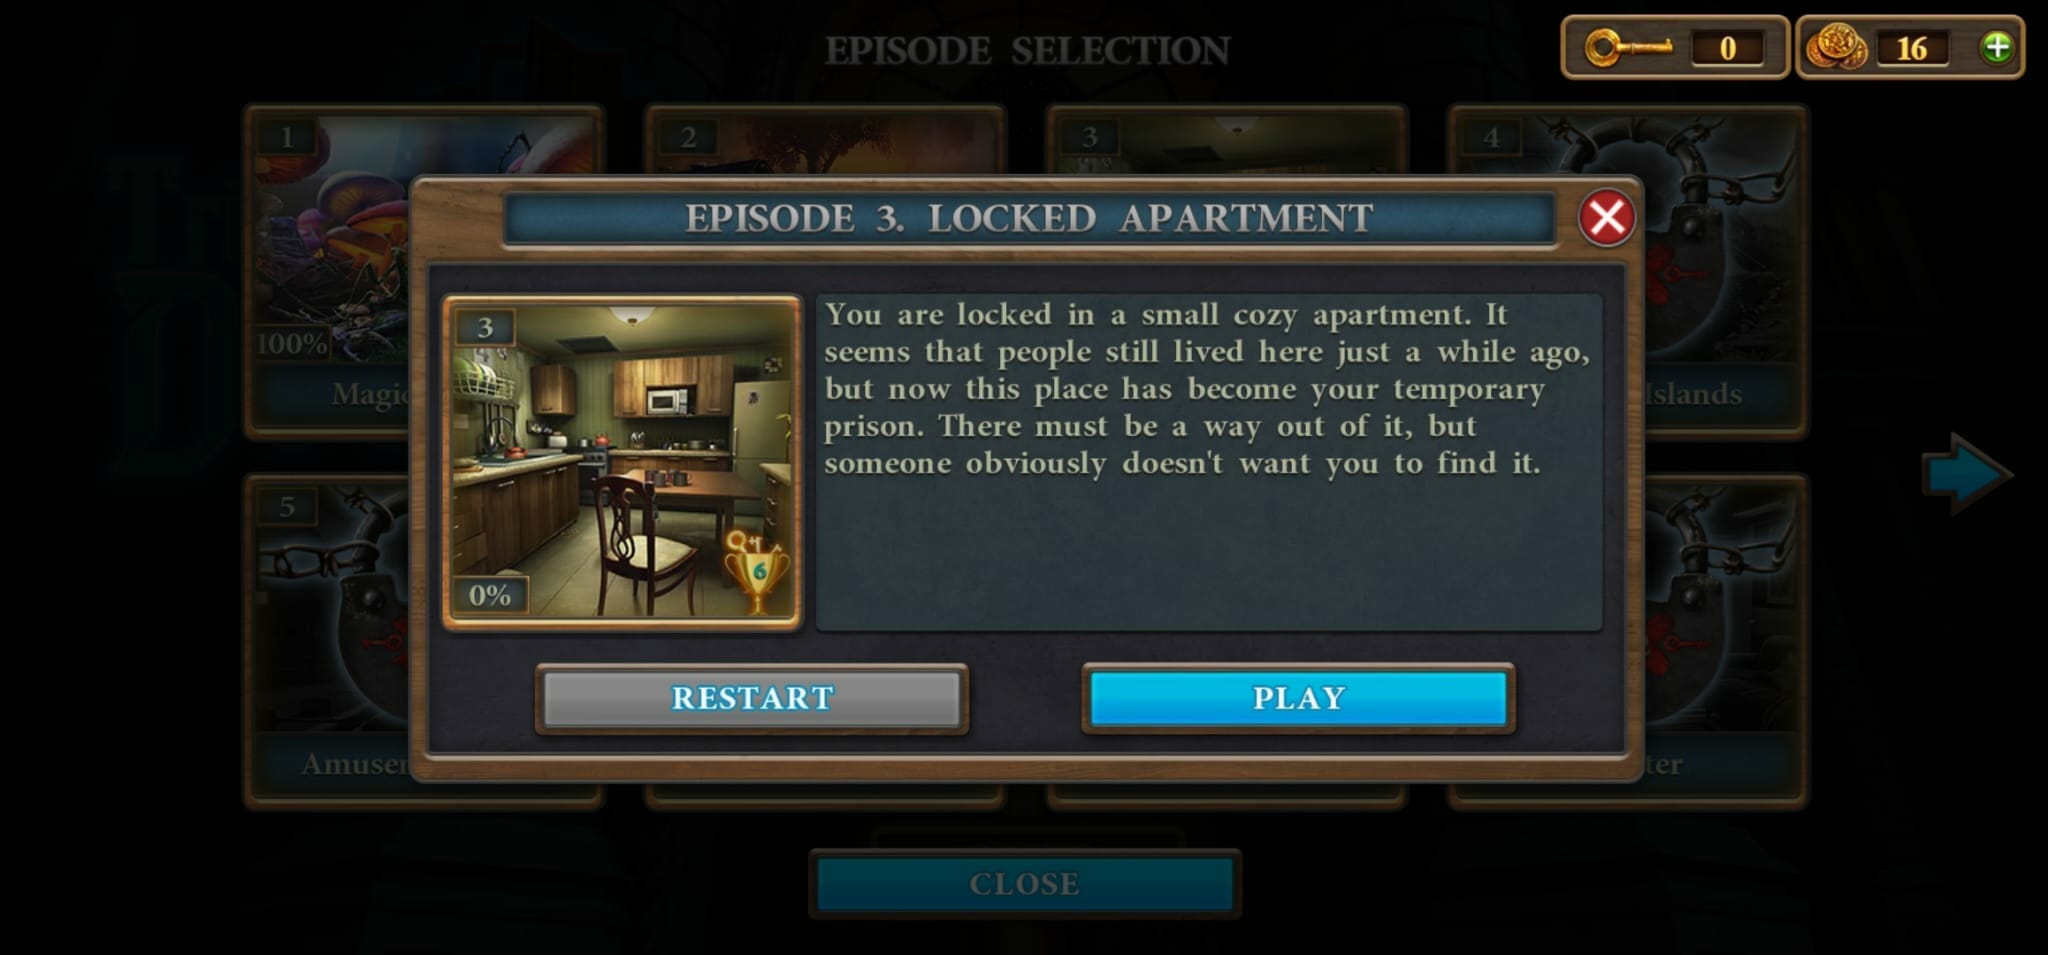
Tricky Doors have different names for the and the third one is called Locked Apartment. Once you have clicked to play this level, you will see the following information:
“You are locked in a small cozy apartment. It seems that people still lived here just a while ago, but now this place has become your temporary prison. There must be a way out of it, but someone obviously doesn’t want you to find it.”
Once you click on ‘play’ you will be transported to an apartment, which is quite dark except for the light coming from a window, as well as a little bit of light on the right. Naturally, you need to find a way to light the room.
The first thing you need to do is click on the small broom, which can be found on the shelf, located on the right side of the room. This will add the item to your inventory and then you can click on the switch, also located on the same side.
Use the broom on the switch to clean it up and there is also a chip you can add to your inventory (there are five you need to find in total). This will close the switch, which you can then click on to light up the room.
There are a few items you can now add to your inventory in this room which are the following:
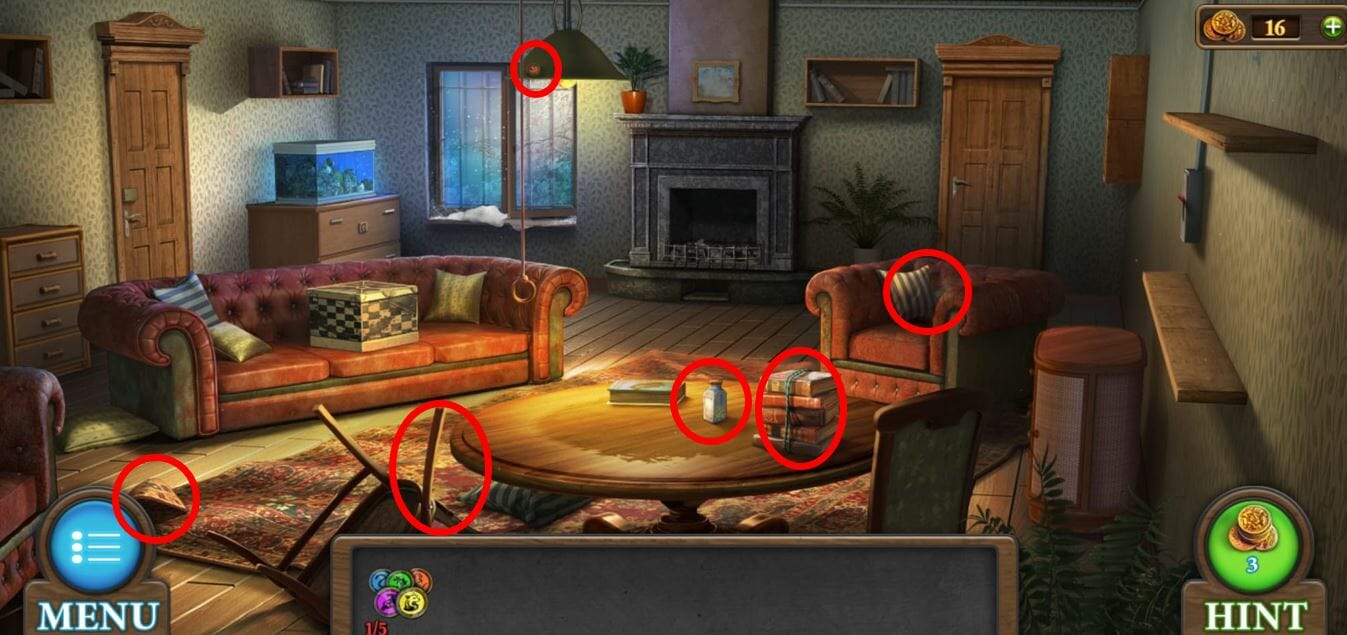
- Chip 1 – one is located on the lampshade at the top in the middle of the room.
- Chip 2 – another one can be found by clicking on the armchair to the right of the table and you will see it on the cushion once it has zoomed in.
- Chip 3 – you can lift the corner of the floor rug in the left corner for the third chip.
- Match – you can also get the match in the same location, i.e. by lifting the rug next to the chip.
- Sleeping pills – the bottle is located in the middle of the table.
- Rope – this is around the stack of books on the same table.
- Chair leg – this is the leg on the chair to the left of the table that is broken and standing upright.
Here is an image of where you can find all of these items if you need a visual of where they are:
Once you have collected all these items, you will then need to click on the fireplace. Here you can use the chair leg from earlier to move the coal. This will uncover a handle and a queen chess piece.
If you look on the sofa on the right side, there is a box and you can insert the queen piece in the hole to play a mini-game.
The aim of the game is to place the queens on the chessboard so that they are not on the same line either vertically, horizontally or diagonally. It seems as though the pieces are in the same pieces for everyone, so we will show you exactly where you need to move the pieces to complete the game:
- Move E7 to E6.
- Move B6 to B8.
- Move C8 to C1.
- Move G2 to F2.
Here is what the board should look like once you have completed it:

Completing this game will make a secret drawer pop out on the right side of the board, giving you the last of the five chips you need.
The handle you have in your inventory can be used on the window, found at the back of the room. You will need to click again to close the window, which will melt away the snow, uncovering a box.
You will have to click on the chips to open the box, revealing another mini-game for you to complete.
The chips may be in a different order than the one we have, so we cannot tell you the step-by-step guide on which order you need to click on the chips as it may be different for you. The aim of the game is to place the chips on the circles with the corresponding colours.
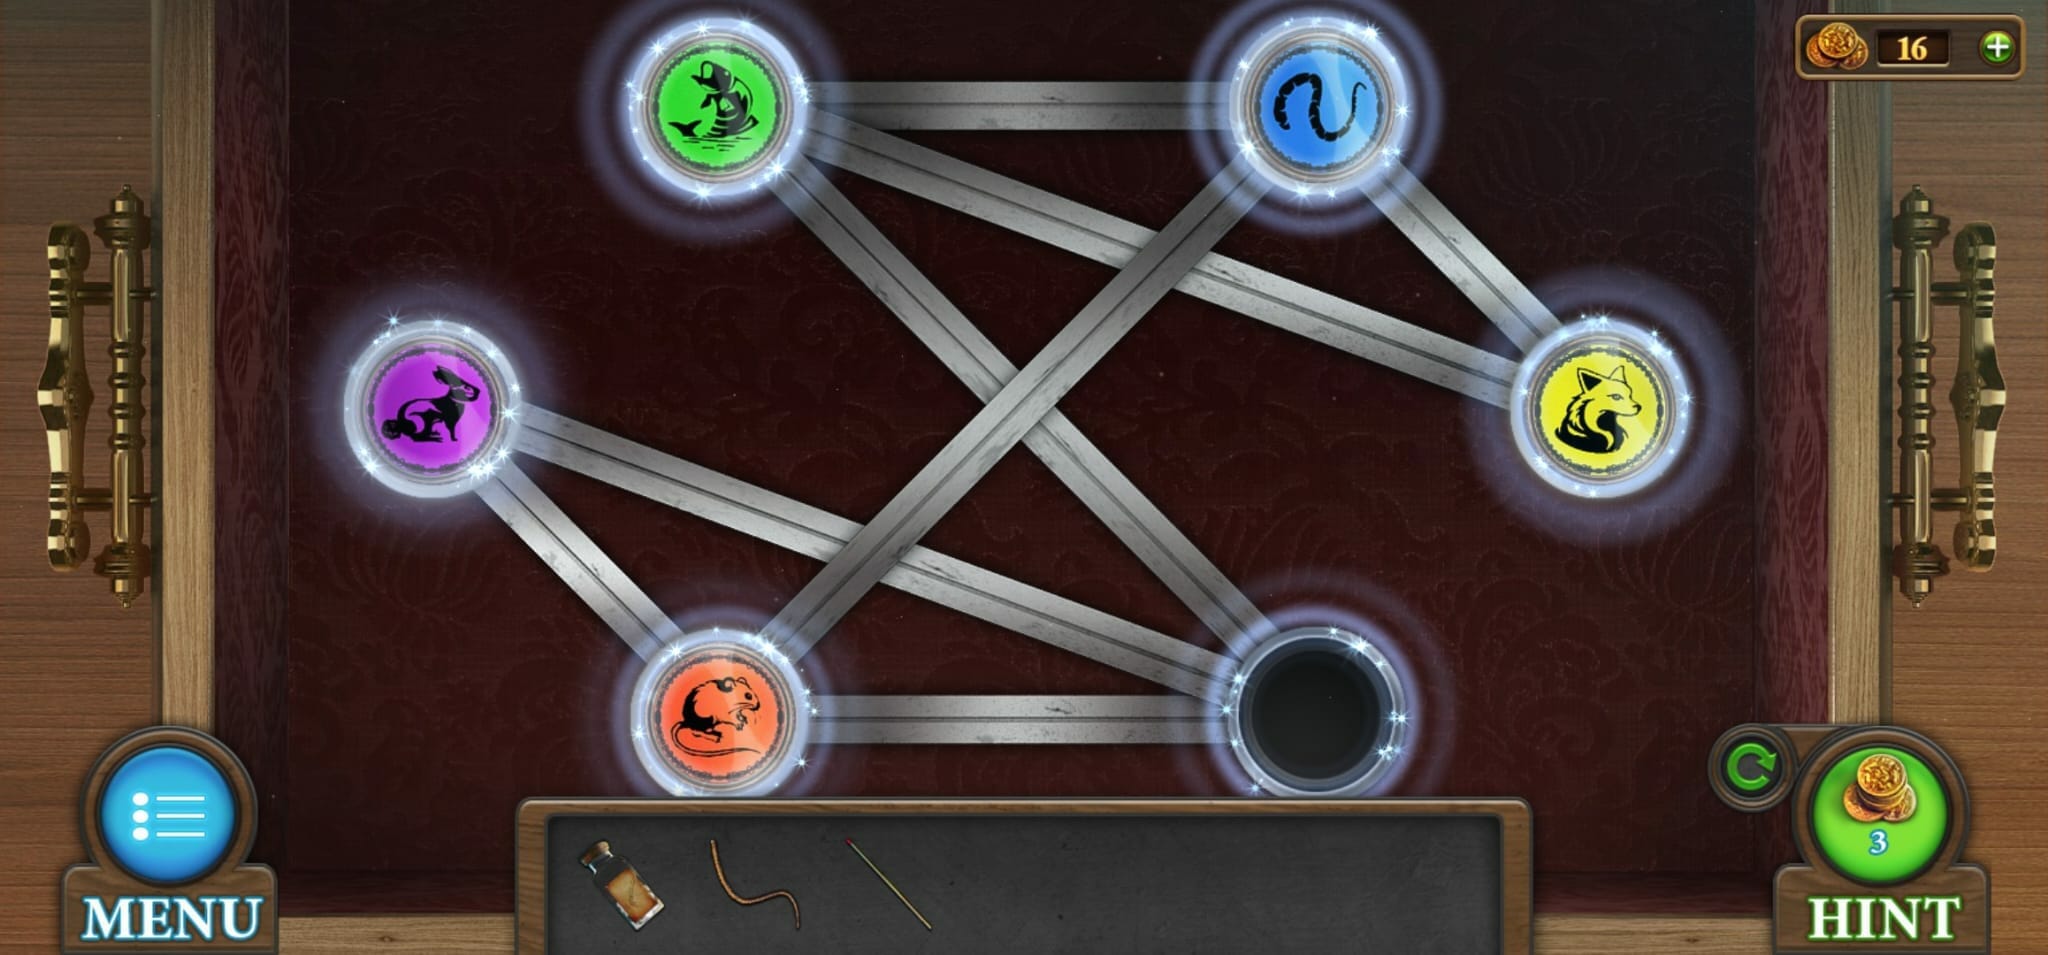
Once you have completed the game, there will be a compartment on the top part of the box that slides down, revealing a magnet that you can click on in to add it to your inventory. You can now attach the magnet and the rope together in order to create the magnet on the rope and this can then be used on the fish tank, found on the chest of drawers to the left of the window, which will give you a key.
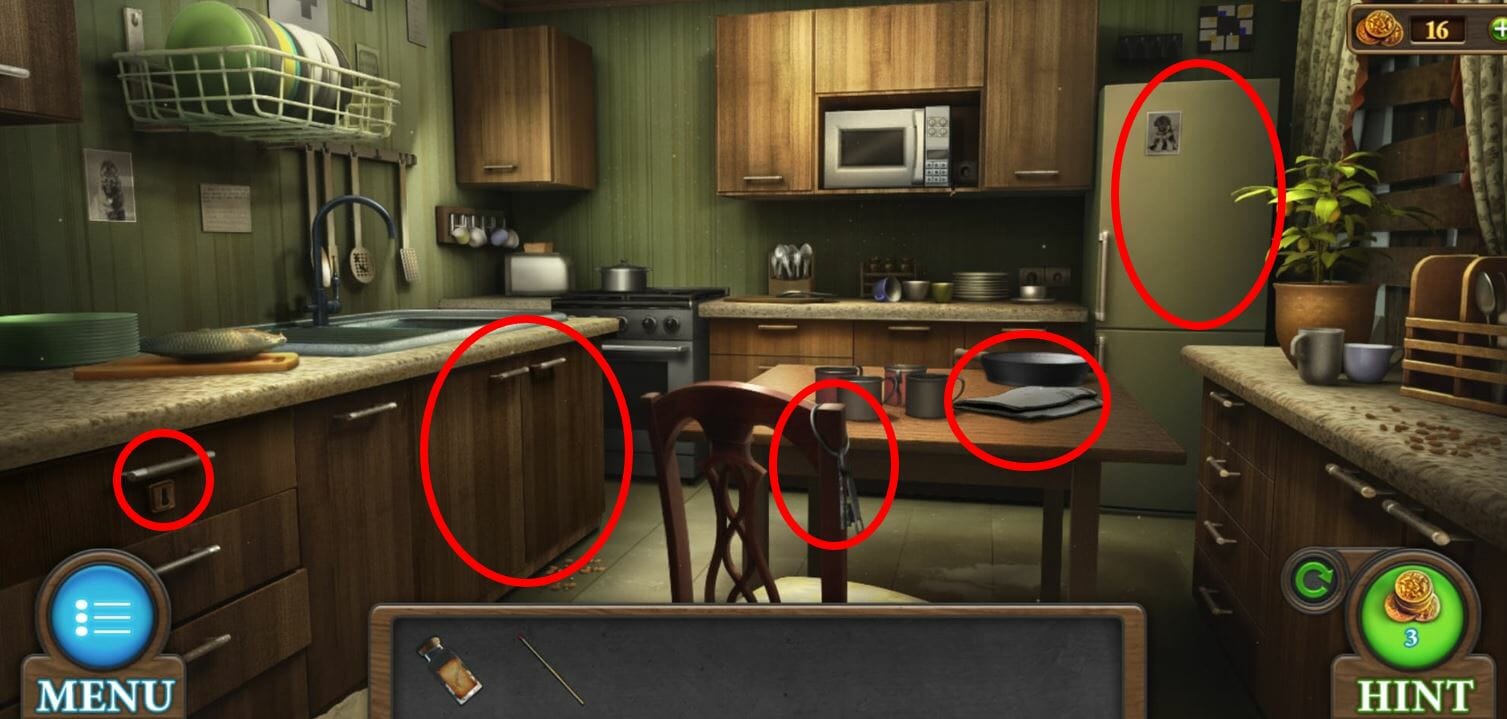
This key can be used on the door on the right, and then you will need to click on the handle to open it, taking you to the kitchen. There are a few items you can collect in this room, which are:
- Newspaper – on the table.
- Frozen meat – when you click on the fridge/freezer, there is a compartment at the top you need to click on to get the item.
- Knife – you can click on the keys hanging on the chair to open the locked drawer on the left side, which has the knife inside.
- Rubber gloves – can be found under the sink.
- Fuse – also under the sink is a bin. Click on it to tip it over and remove the rubbish to reveal the fuse underneath.
If you are having trouble finding some of the items, we have highlighted the locations in the image below:
Once all the items have been collected, you can now go back to the first room and use the knife on the striped cushion, which is on the armchair on the right. This will give you a new key, which can be used on the door on the left, revealing a new mini-game. It seems as though this game is the same for everyone so here are the steps you need to take to complete it.
There are four bars you can move and different screws you can move up and down. I have labelled the screws and bars in the image below so it will be easier to describe the motions you need to do to complete the game.
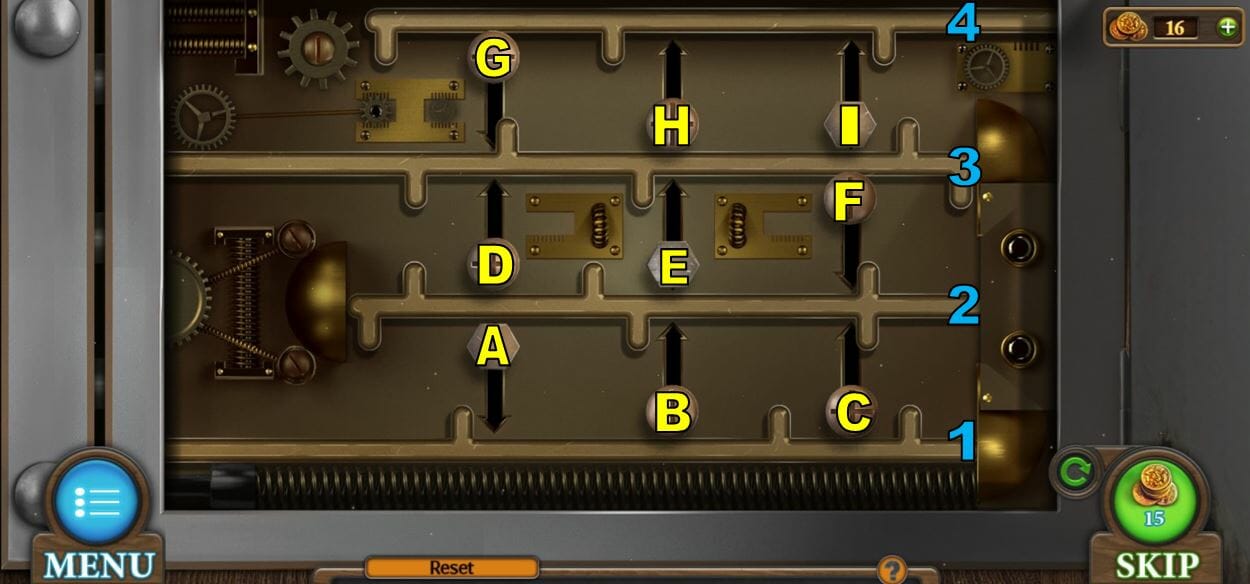
Here is the order you need to slide the objects to complete the game:
- Slide bar 2 to the left to move screw B and C up and slide bar 1 all the way to the left.
- Slide screws A, B and C down and move bar 3 as far left as you can. Move screws D and E up and move bar 2 all the way to the right.
- Slide screws D, E and F down. Slide screw H up and then move bar 4 as far right as you can (which should just be a little bit). You can now move screw I up and move 3 all the way to the left.
- Slide screws G, H and I down to move bar 4 all the way to the right to open the lock.
You will then see the door open and you can click on the fuse box. Use the fuse you have in your inventory on this box, which will place it in the corner.The next step is to use the rubber gloves to turn switch the fuses at the top, which turns the light on. You can now click on the room to enter it.
There are a few items you can collect from the room, which are:
- Screwdriver – from the brown toolbox on the right.
- Screwdriver bit – first click on the dryer and use the rubber gloves to pull the plug out. Then click on the dryer to open it, pull out the clothes and click on the pocket to get the item.
- Plug with wire – use the knife on the cord for the dryer to add this to your inventory.
You will now need to go back into the kitchen and use the plug with the wire on the cord for the microwave. You need to click a few times to attach the pieces together and to plug it into the socket. You then need to put the frozen meat in the microwave and close the door.
In order to make the microwave work, first click on the top right of the microwave where you can turn the dials. This corresponds to the positioning of the four cup handles on the table and here is where you need to turn the dials:
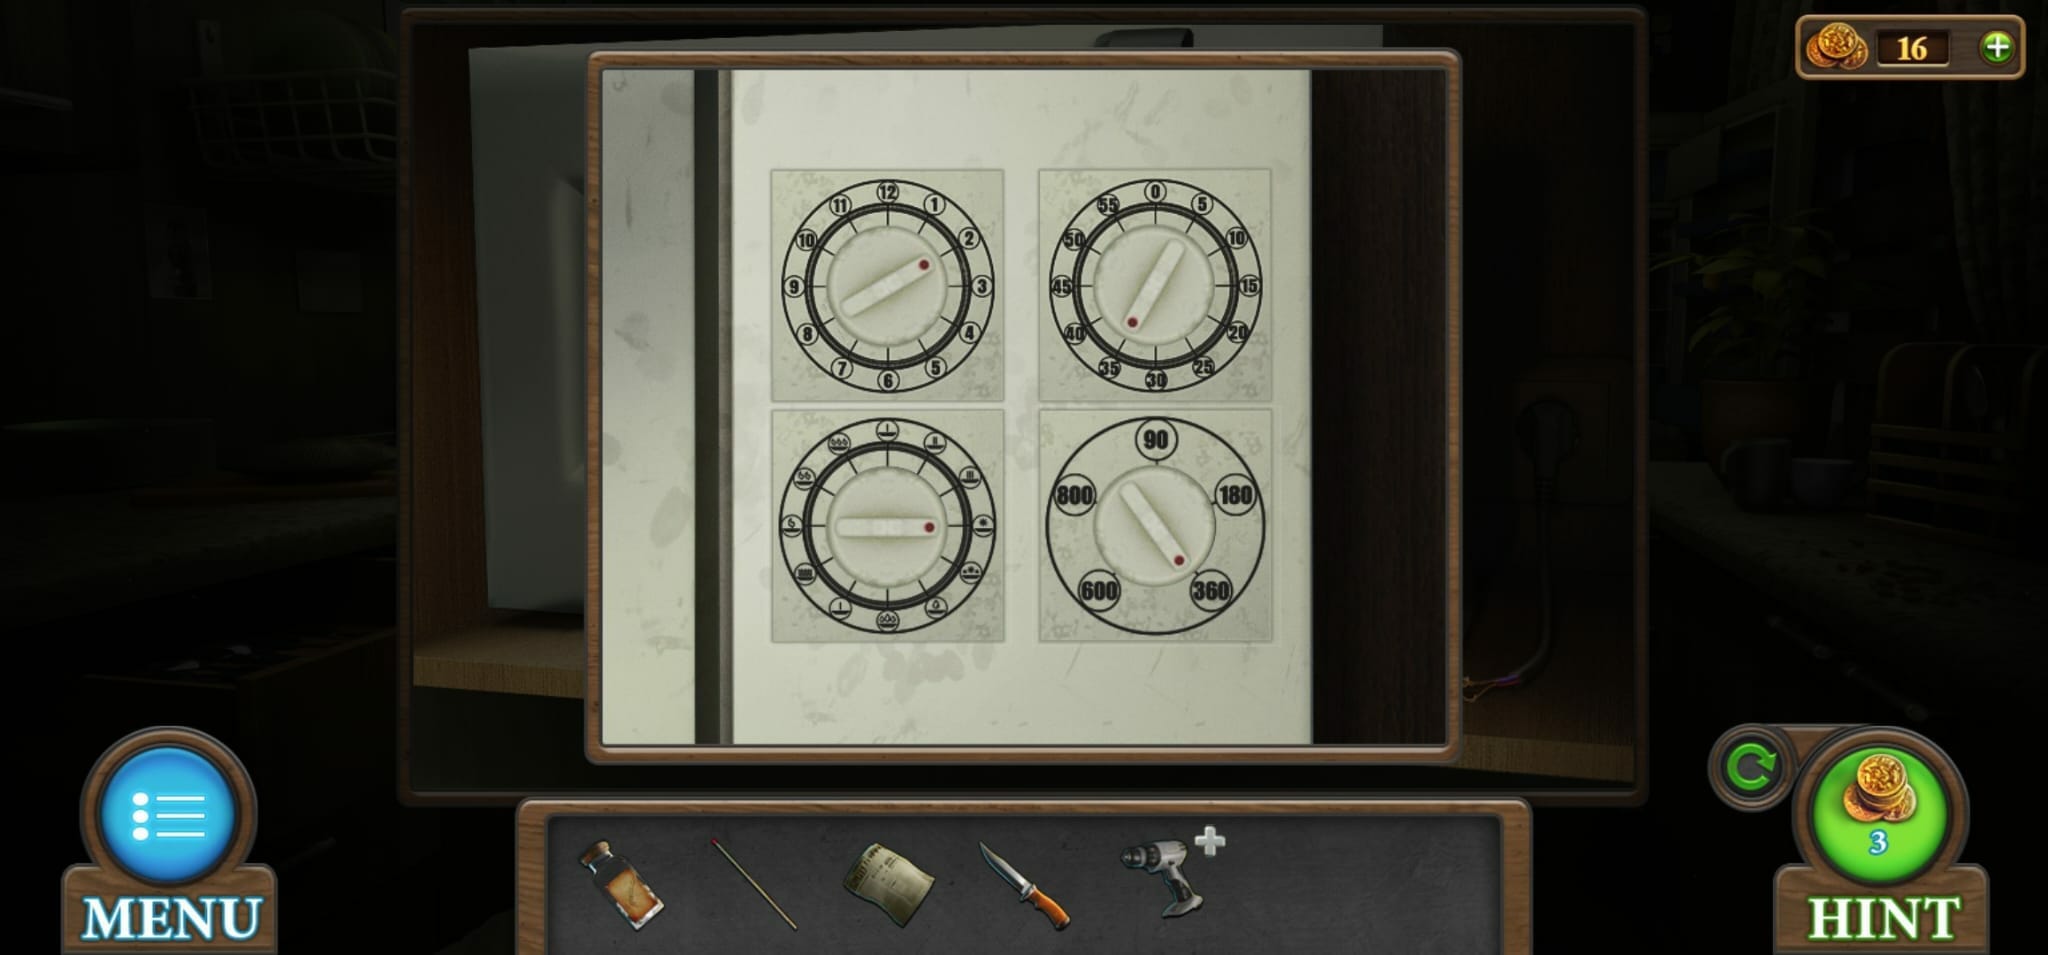
This will then unlock the bottom pad of the microwave where there are different colours that light up. When you got the drill bit from the clothes in the dryer, there was the word ‘MICROWAVE’ above the pocket and part of the word ‘WAVE’ was in colours red, green, orange and purple.
In order to use the microwave, you need to keep these colours on, which are the three buttons on the right of the pad and the one in the middle.
This will defrost the meat and you will need to click on the door to open it. Sleeping pills you have in your inventory can then be added to the meat. Click on the meat again to add the bait to your inventory.
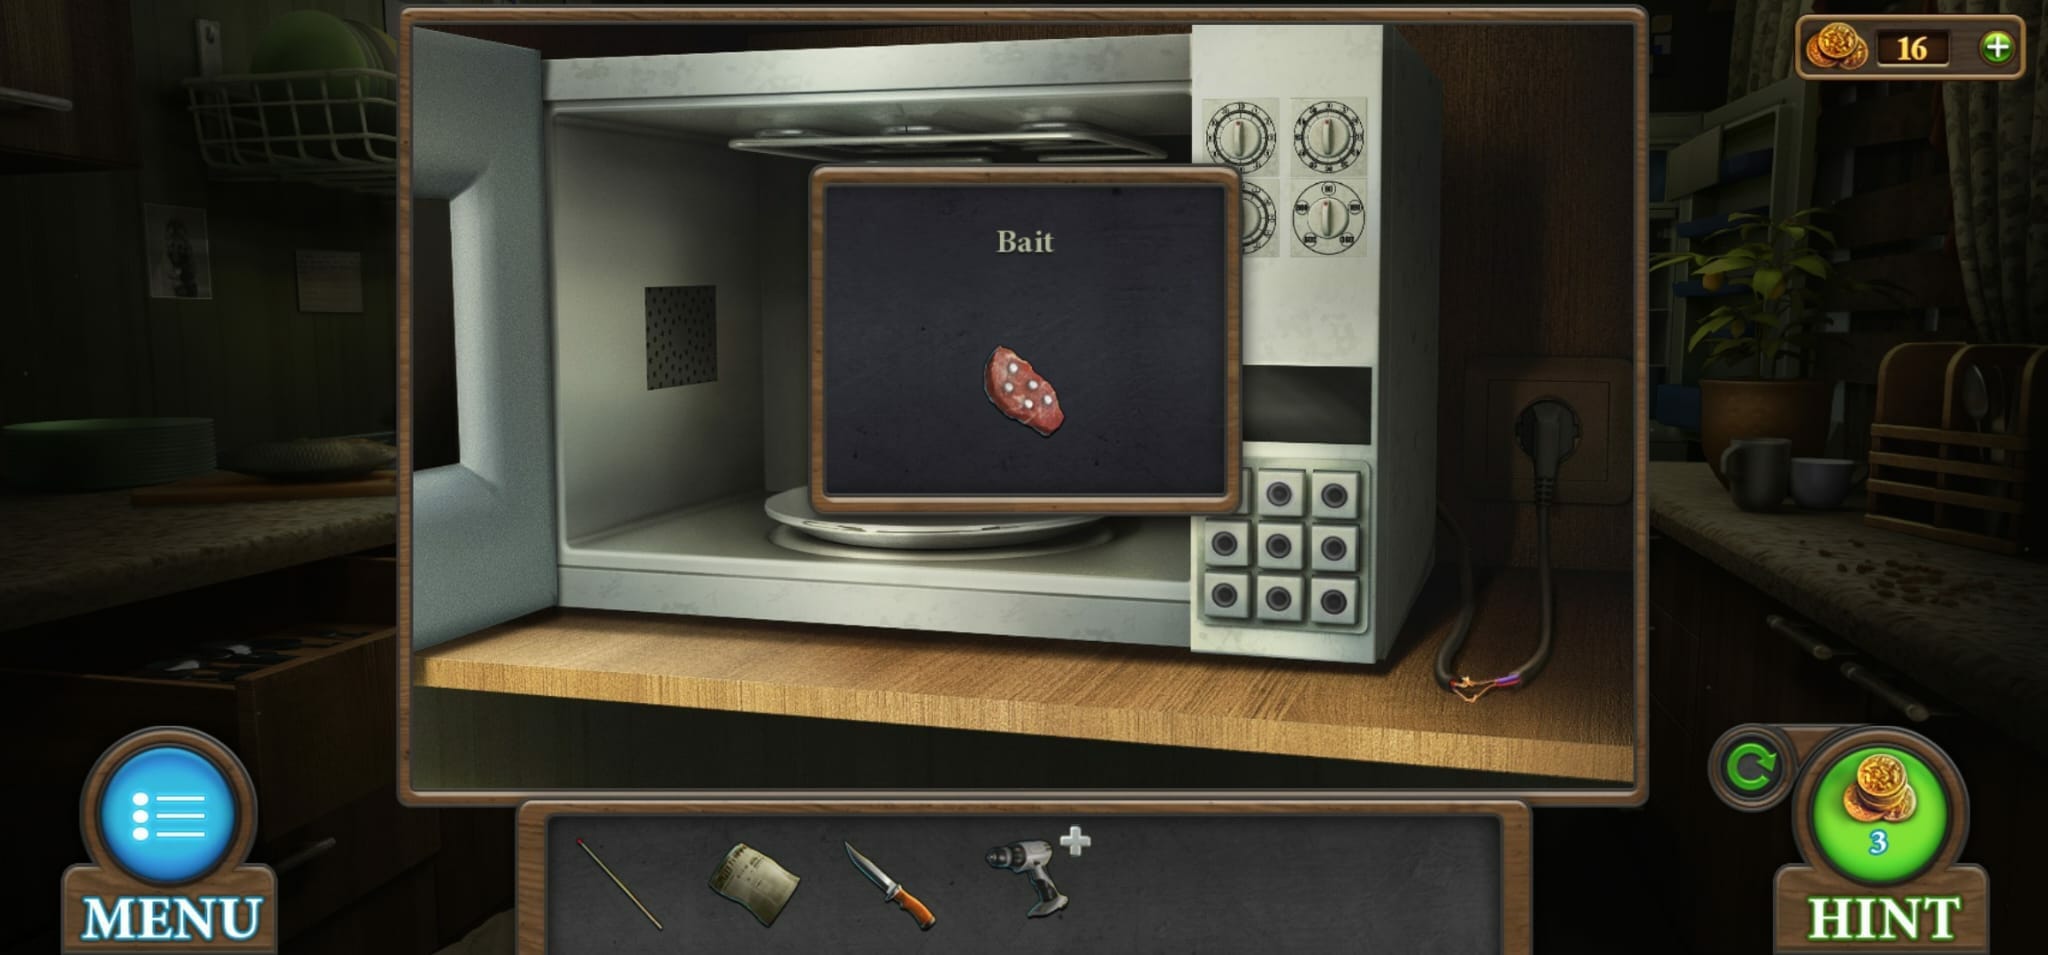
Now you need to go back to the room with the dog and use the piece of meat on them. This will put the dog to sleep and you can click on the wood on the left side of the dog to add it to your inventory, as well as the kettle on the top shelf at the back of the room.
Once you have collected these items, you need to go to the room you originally started in and click on the fireplace. Add the newspaper, wood and then the match to make a fire. This will reveal a picture above the fireplace.
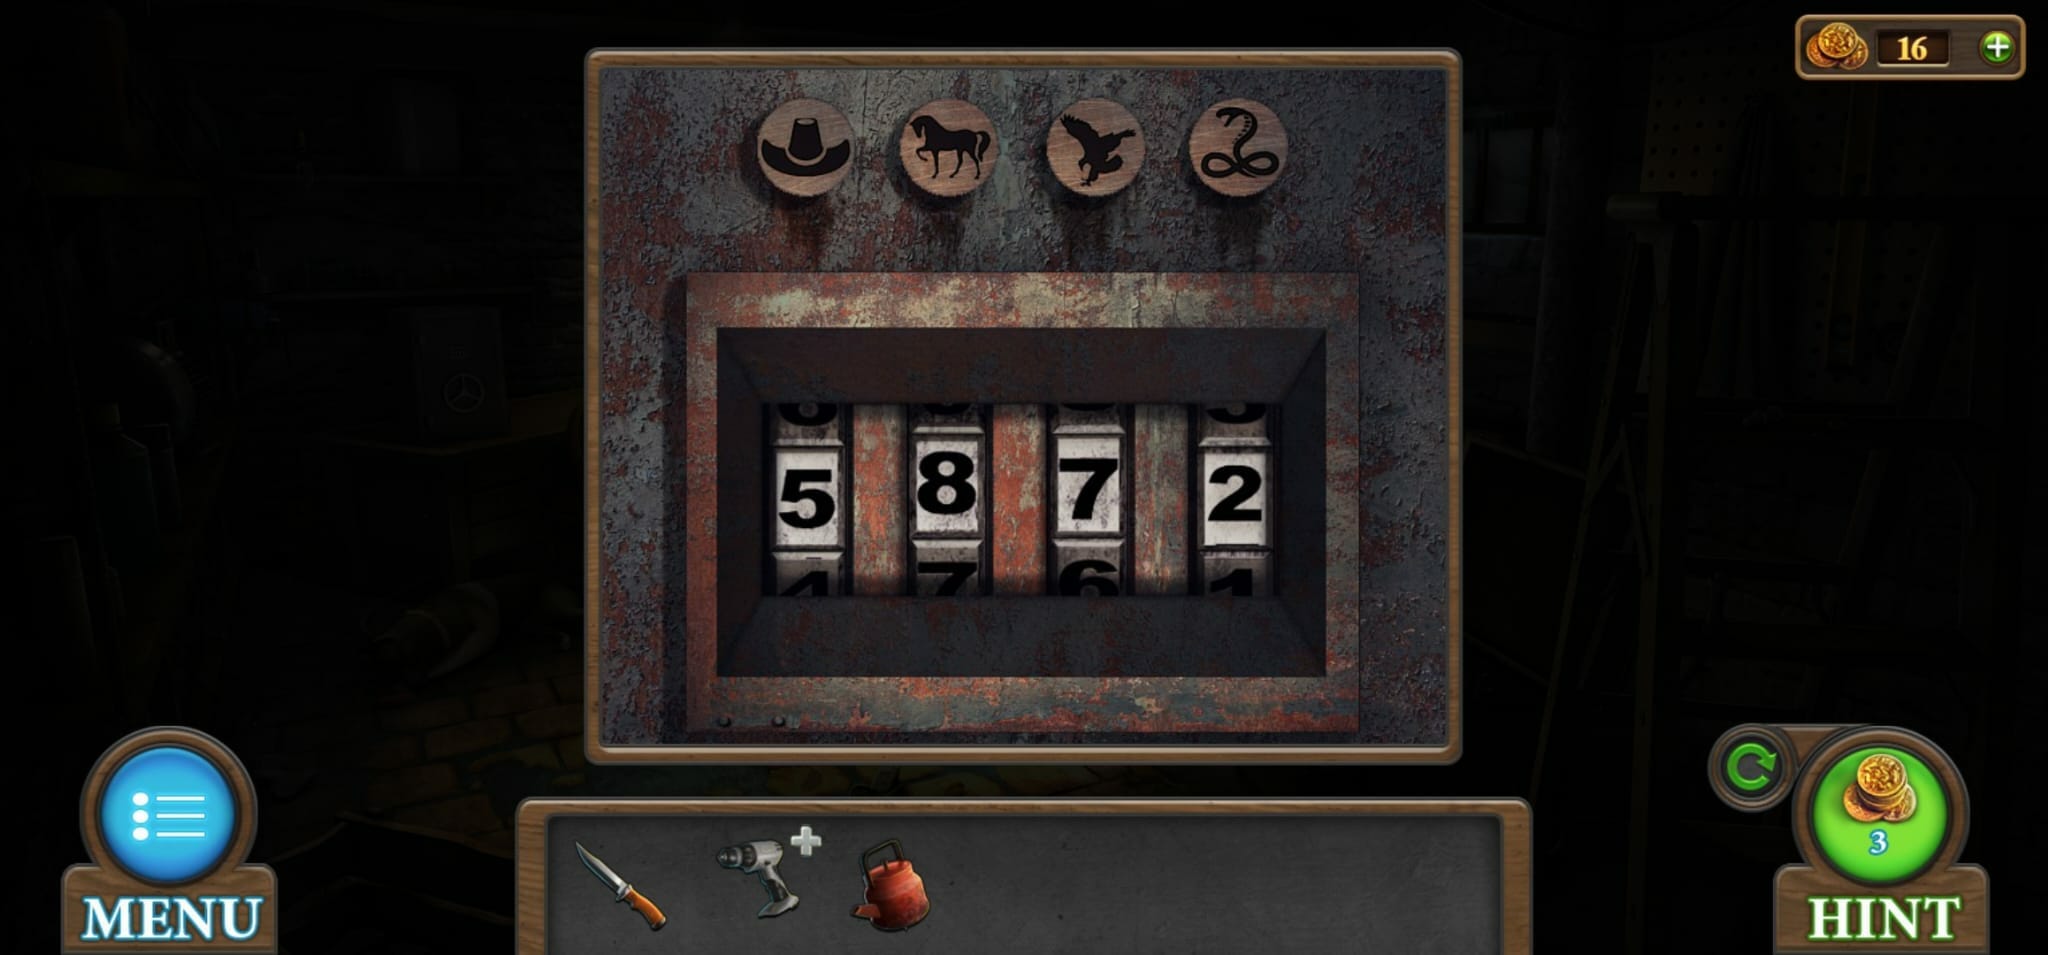
If you go back to the room on the left, you can access the safe which is located on the table and you can see that you need a four digit code with the clues of a hat, horse, bird and snake on top
You can get the answer to this by clicking on the picture at the back of the room where you can count the number of objects for each, as well as the picture above the fireplace. The code to the safe is 5872 and you can get a valve from the top shelf once it has opened as well as a battery from the bottom shelf.
You can now add the screwdriver, drill bit and battery together to have a functioning electric screwdriver.
The next thing you need to do is to go back to the kitchen and on the ceiling you will see a grill, which you can use the screwdriver on to open it. This will reveal a key in the corner, which can be added to your inventory.
Now, you need to click under the sink and click on the panel at the back. Add the valve to this to play another mini-game.
The aim of the game is to restore the pipeline and as there are different puzzles you can get, we cannot give you a step-by-step guide but you need to create a path from one side of the pipe to the other side. You do not add the valves in the path.
Once you have created the path, you just need to click on all the valves to start the water supply and you will have completed the game.

You can now use the kettle on the sink and click on the tap to fill it and add the kettle with water to your inventory. Click on the stove in the back of the room to turn it on and then place the kettle on top. After a couple of seconds you can click on the kettle to add the kettle with boiling water to your inventory.
Now you need to go back to the room with the dog and click on the window on the right. You need to use your knife to break away the ice at the top and then use the boiling water from the kettle on the lock to melt the ice away.
Now all you need to do is add the key to the lock and you will complete the level by clicking on the open window.

If you need help for the next level, we have created a full guide, which you can see by clicking here.

